Last Updated on: 16th October 2024, 07:36 pm
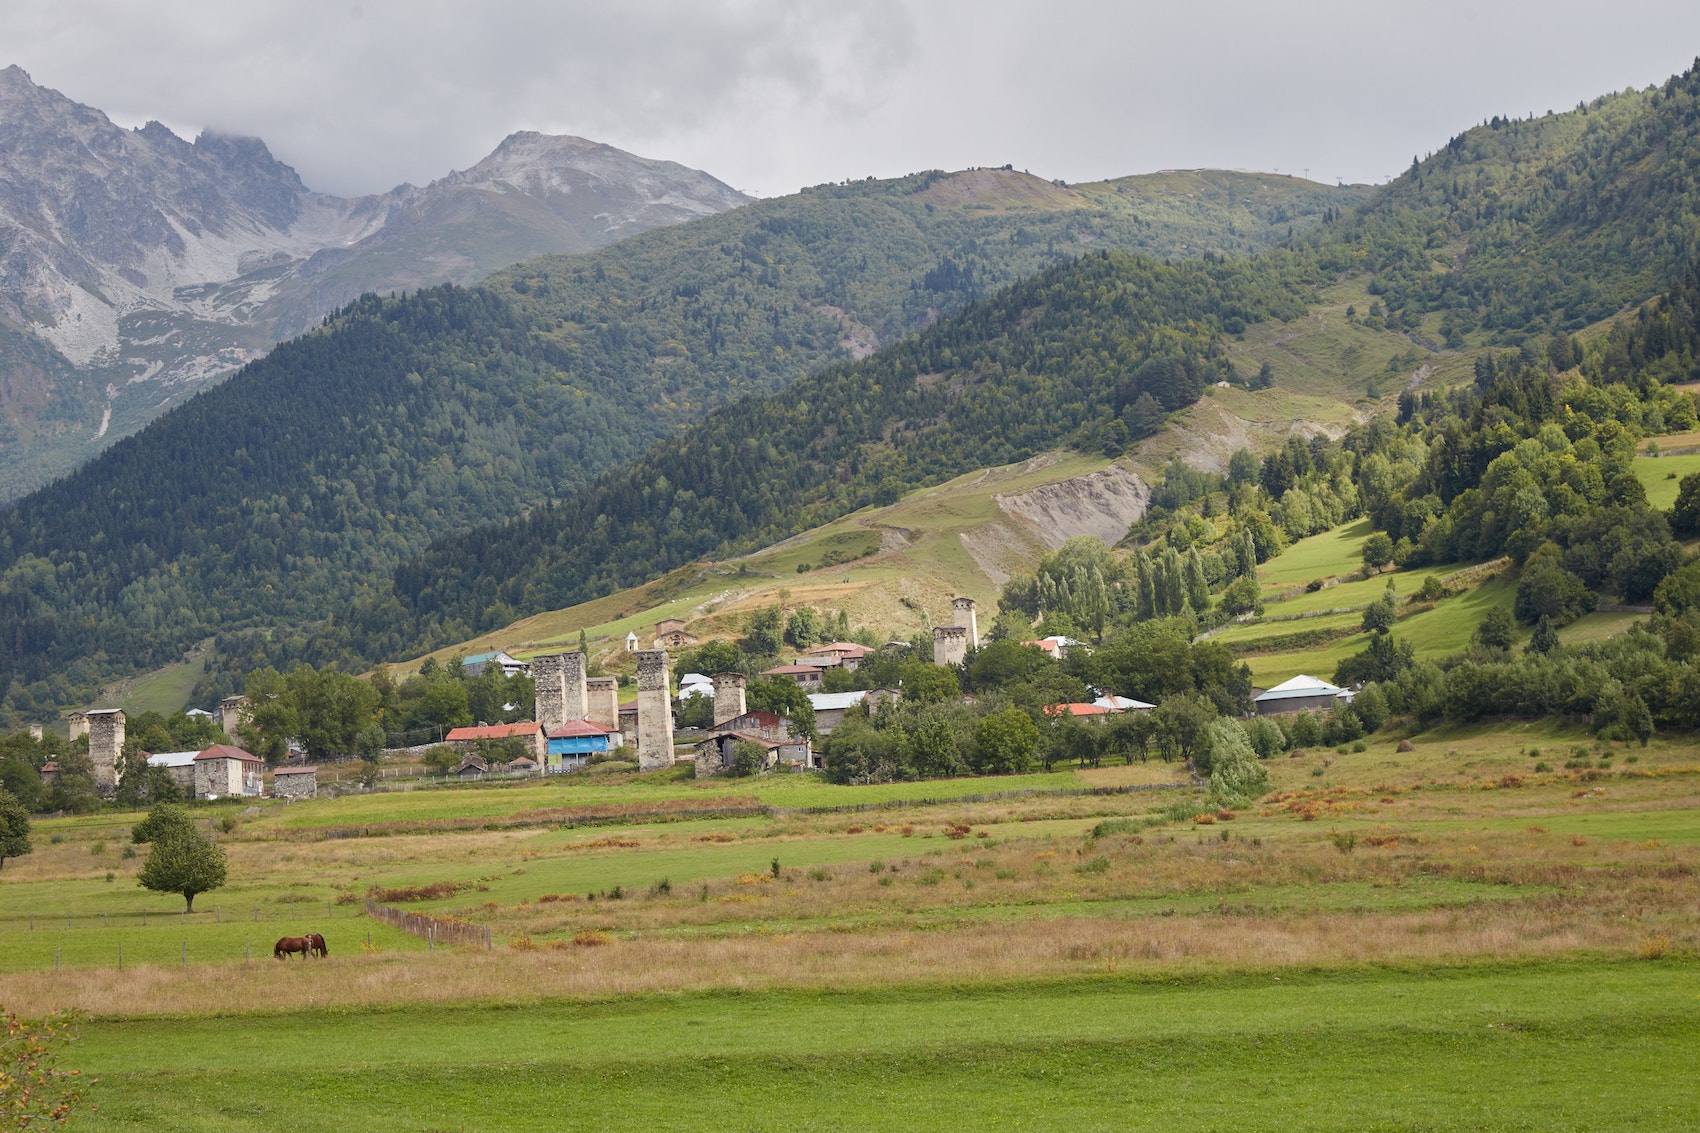
The four-day hike from Mestia to Ushguli is arguably Georgia’s most popular long-distance trek. And it’s easy to see why. The scenery is stunning and the trek is approachable for beginners. Furthermore, trekking from Mestia to Ushguli offers insight into Georgia’s unique Svaneti region. The area is full of charming Svan towers that you can’t see anywhere else.
While the trek itself is four days, I spent a night in Mestia before starting and I also stayed in Ushguli upon finishing. My trip to Svaneti lasted nearly a week, and with so much to cover, I’ve divided this guide into two sections.
In Part One, we’ll be going over days 1 and 2 of the four-day hike. Additionally, we’ll also cover some things to do and see in Mestia before you start, though many hikers choose to explore it after their trek is finished. Check Part Two for a guide to the remainder of the hike.
Trekking From Mestia to Ushguli: Essential Info
THE BASICS: The trek lasts 4 days and the total length is around 55 km. The route takes hikers from Mestia to Zhabeshi to Adishi to Iprali to Ushguli. There are other small villages nearby each of these where some people prefer to stay instead. Factoring in the long train ride from Tbilisi and a night in Mestia and Ushguli before/after your trek, set aside at least a week for your trip to Svaneti.
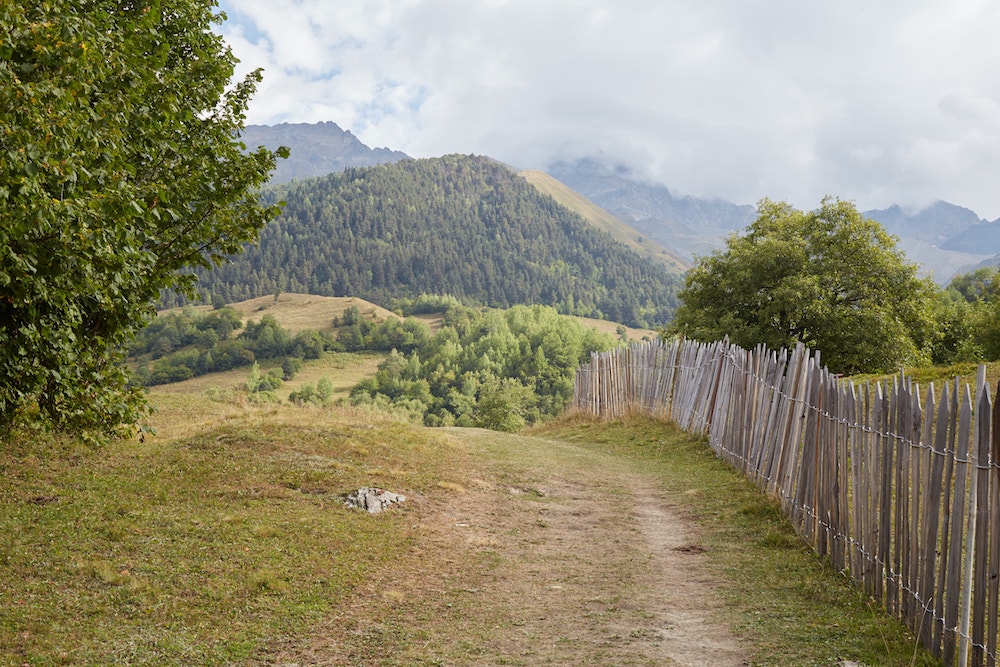
There are also additional day hikes you can take from both Mestia and Ushguli if you wish to extend your trip. Also note that while the standard trek lasts four days, some people opt for a more challenging three-day version of the trek. In the following guide, however, we’ll just be focusing on the standard route.
Overall, the hike isn’t terribly difficult and for the most part, isn’t too steep. The trails are poorly marked, however, and the correct path isn’t always clear. And if it’s your first time trekking with such a heavy backpack, you might struggle with shoulder or back pain.
ACCOMMODATION: While you can bring a tent and camp if you wish, most people spend each night in a local guesthouse. That makes this trek great for first-time long-distance trekkers.
The guesthouses all offer similar services, and they provide both dinner and breakfast for a reasonable price. While the rate varies slightly from place to place and also from village to village, expect to pay around 40GEL per night including dinner and breakfast.
I’ll be going over the guesthouses I stayed at in each village in the guide below. But should you book in advance or search for a place upon arrival? Read more at the end of the article.
PACKING: The basic things you’ll need are decent shoes, a suitable backpack, sunscreen and a raincoat. Trekking poles are optional but well worth it. Read more packing tips at the end of the article.
USEFUL RESOURCES: By far the most popular article about the trek is the one by Jozef from Caucasus-Trekking.com. His guide is excellent and nearly every trekker I met was using it. However, there were numerous instances, especially on the first day, where the directions weren’t completely clear. That’s why I’ve provided plenty of pictures to help prevent potential confusion.
I’d also highly recommend downloading his GPX file which marks the entire hiking trail. (If you’re an iPhone user, download an app called ‘GPX Tracker’ first and then try downloading the GPX file). Additionally, be sure to download the Maps.me app on your phone which has many of the hiking trails clearly marked for offline viewing.
Also be sure to get a Georgian SIM card before your trek. Cell phone reception worked just fine while out on the trails, but strangely enough, not in some of the towns! Furthermore, guesthouse Wifi is often spotty or not working at all.
ADDITIONAL INFO: Check the very end of the article for more info on transport to Mestia, along with more comprehensive packing and accommodation tips.
Day 0: Exploring Mestia
Getting to Mestia from Tbilisi is a long journey that requires both an overnight train and a four-hour bus ride (more below). While I’ve read that some people start their trek immediately upon arrival in Mestia, that seems to be taking things way too fast!
Unless you slept very soundly on the train and bus, you’ll likely need an extra day of rest before embarking on the trek. But regardless, there’s plenty to explore around Mestia and it’s well worth spending a full day in town.
Note that some, if not most, trekkers arrive in Ushguli and then immediately hire a taxi back to Mestia. They then spend some time in Mestia at the end of their trek before heading onward. Ushguli, however, is well worth exploring also. That’s why I think it’s best to explore Mestia in the beginning and Ushguli at the end.

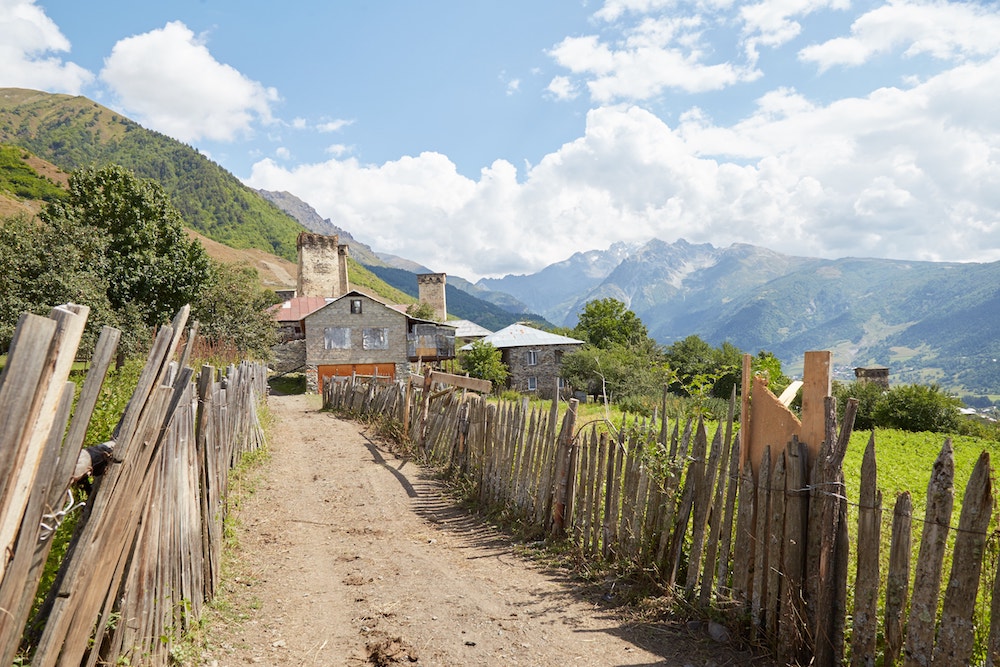
Mestia is the largest city of the Svaneti region. While it only has a couple thousand people, it will feel like a metropolis compared to the other towns you’ll be visiting.
The town has all the tourist amenities you’d expect, while most staff at local hotels and restaurants speak English. This is also your last chance to go to the ATM or buy some snacks before your trip.

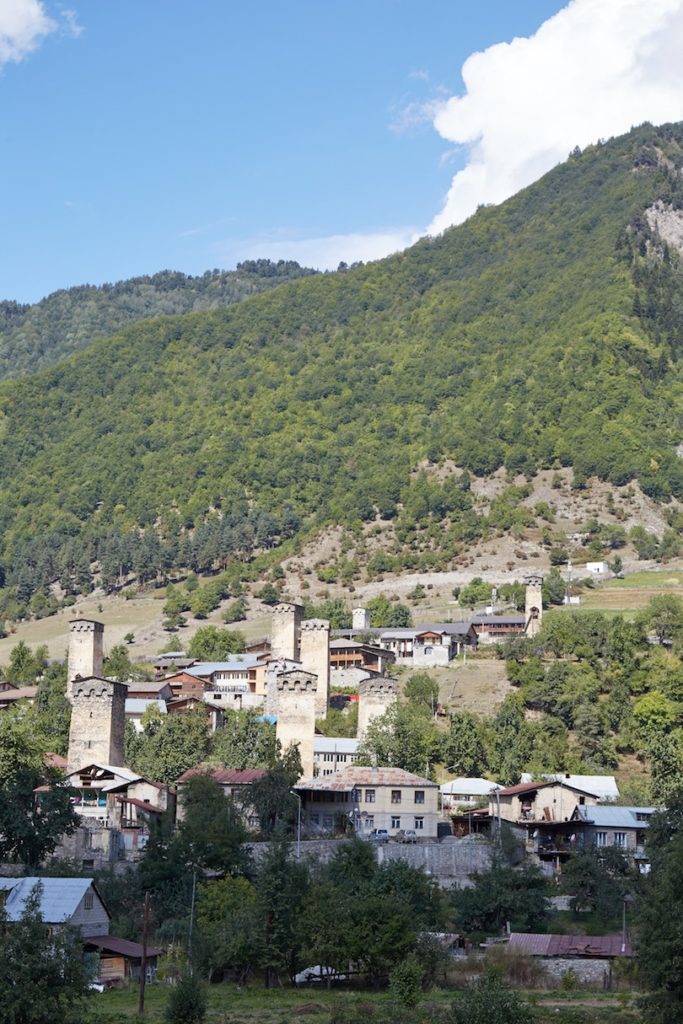
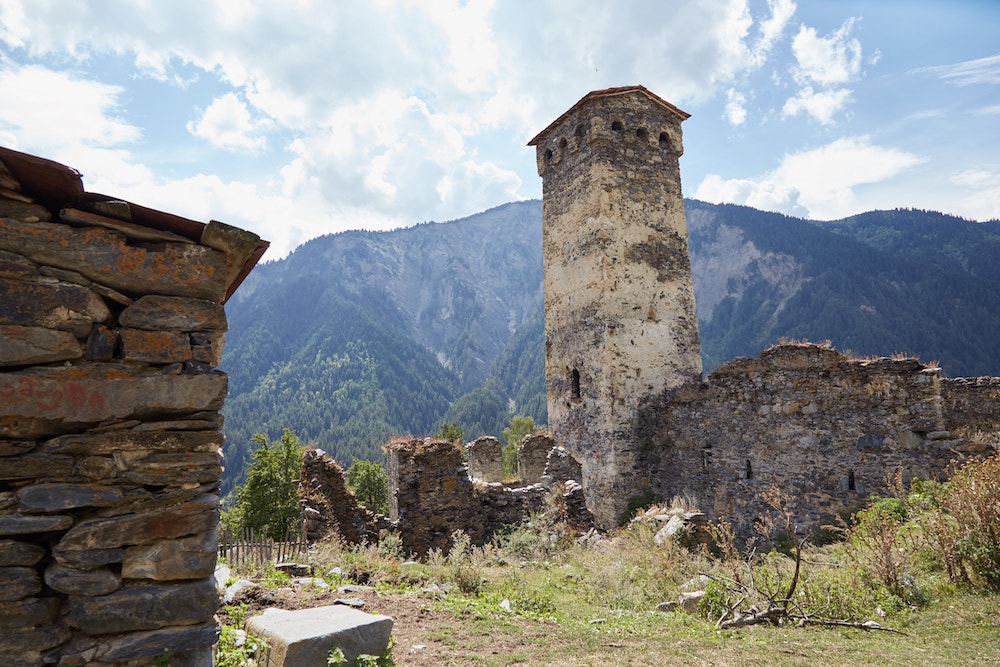
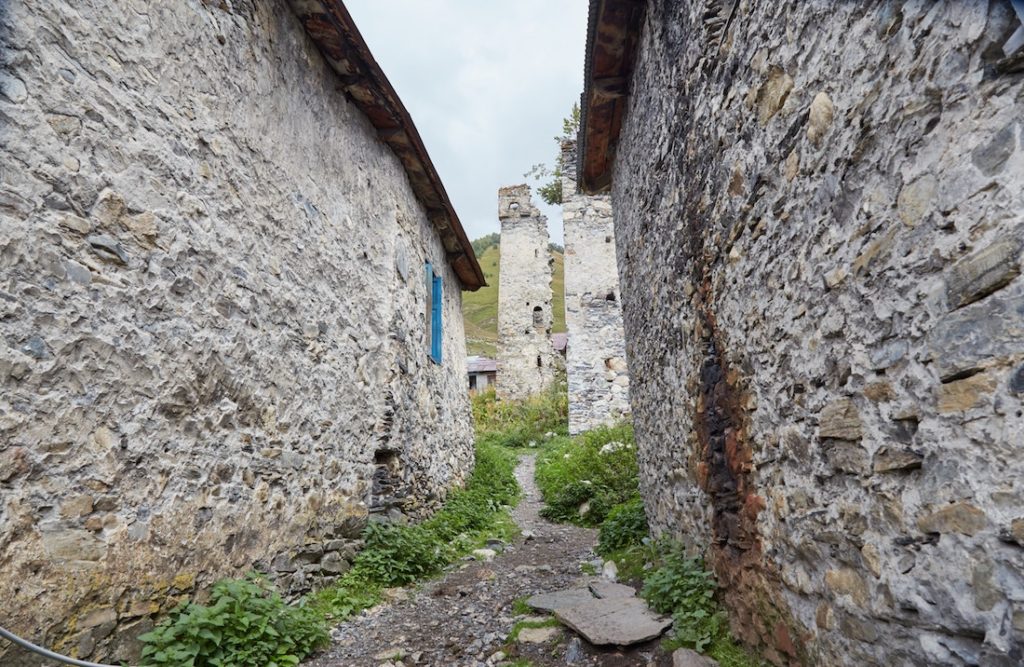
Climbing the Svan Towers
While in town, don’t miss the opportunity to climb up some of the region’s iconic Svan towers. No, you can’t just walk into any tower you see, but a few local families have opened their towers up to the public.
The first one I encountered was the Margiani’s House Museum. Located northeast of the town center, it took a bit of effort to find, despite being labeled on most map applications. After asking a few locals, I finally managed to find it. The family who owns it wasn’t there but the door was left unlocked.
While it’s fun to climb up to the top, you won’t learn a whole lot. That’s why I recommend also visiting the Ratiani Family Tower as well.
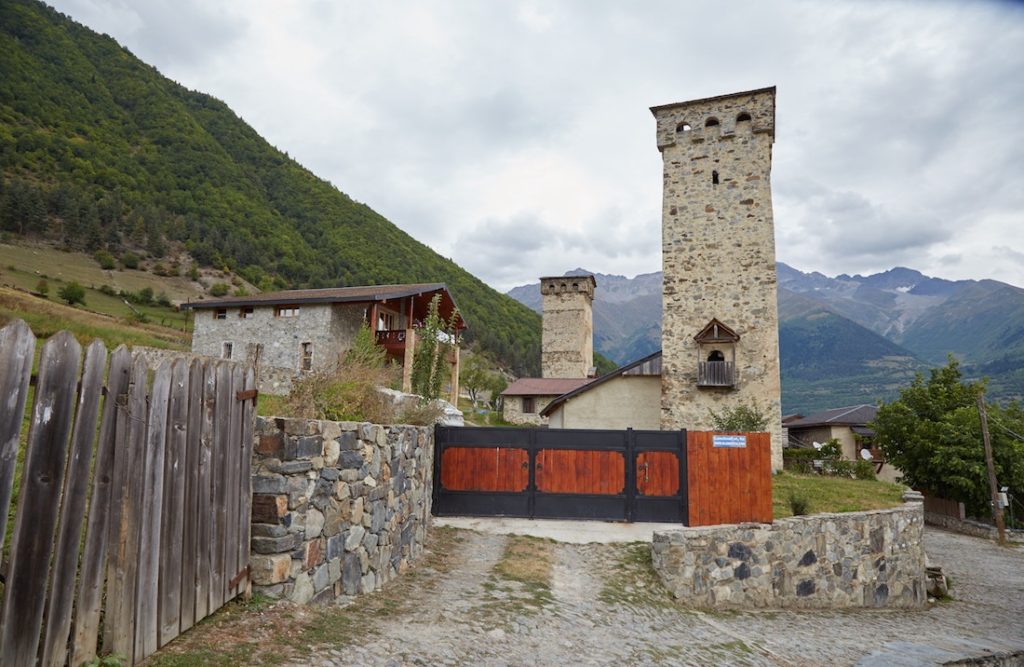


I came across the Ratiani Family Tower by accident while searching for the Mikhel Khergiani House Museum (which I never ended up finding). Luckily, the Ratiani tower, located southwest of Margiani’s Tower, also happened to be a museum.
I was greeted by a member of the local family, and for a few lari, he explained the tower and its original function to me. Many of the Svan towers in the region, he explained, date back around 1,000 years. And most have been owned by the same families throughout the centuries, having been passed down from generation to generation.


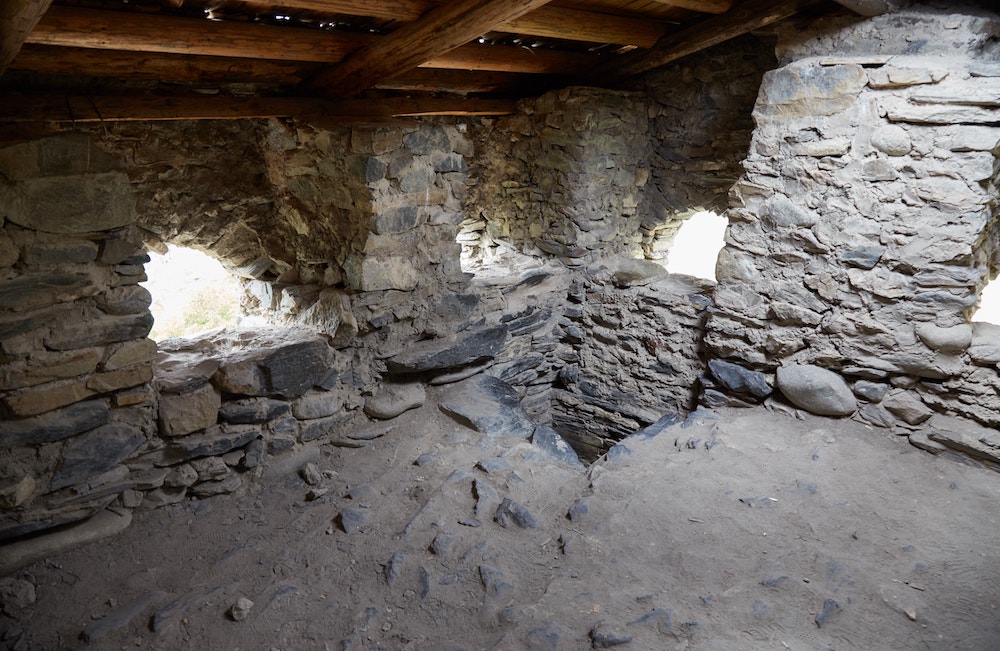
The Ratiani Tower was built in 11th century and it served multiple functions. The first floor was a home where the entire family slept. And in the winter it also functioned as a barn, meaning the family and animals all slept in the same room! Furthermore, the towers could also be used as defensive fortresses.
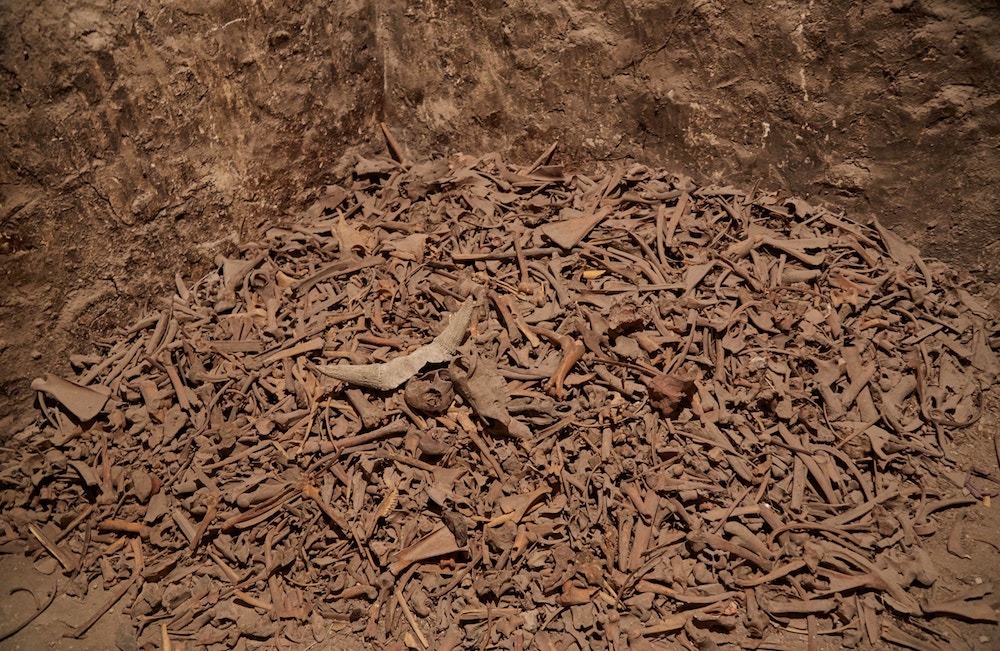
This tower was around 25 meters high. And aside from the first-floor former dwelling space, the second floor contained a huge pile of old mountain goat bones! Supposedly, they played a role in ancient Svan pre-Christian rituals.
The Svaneti Museum
Another highlight of Mestia is the Svaneti Museum. Svaneti is a region with a distinct culture and even language from the rest of Georgia.
For much of its history, Svaneti was part of the ancient kingdom of Colchis. Colchis was even referenced in Greek myths like Jason and the Argonauts. And it’s believed that the Golden Fleece of legend was inspired by the Svans, who long used the technique of extracting gold from the river using sheepskins.
Entry costs 10GEL, but with no staff in sight during my visit, I just walked right in.

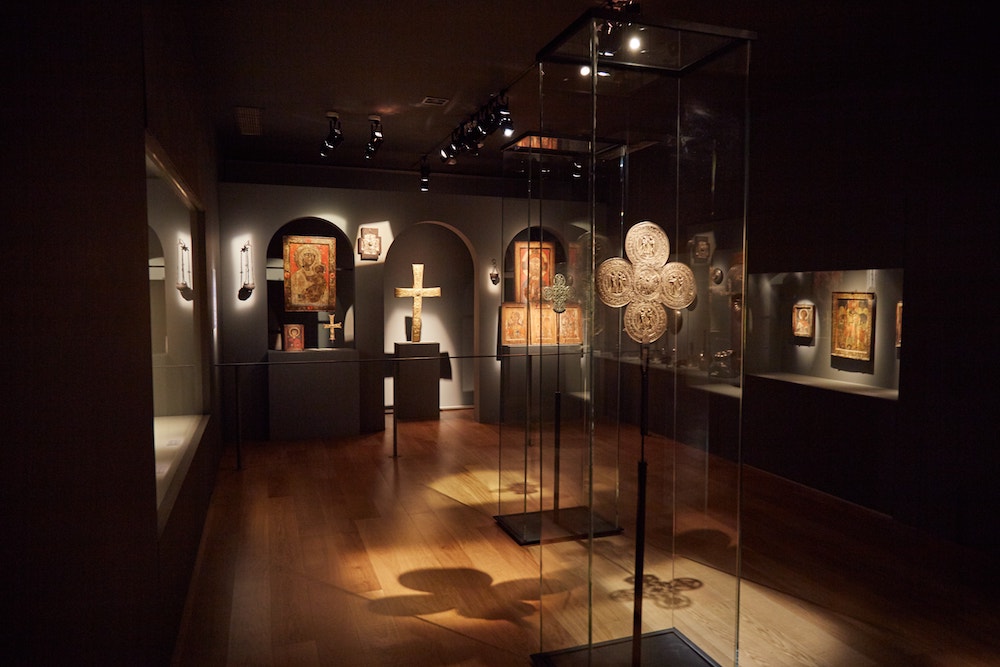
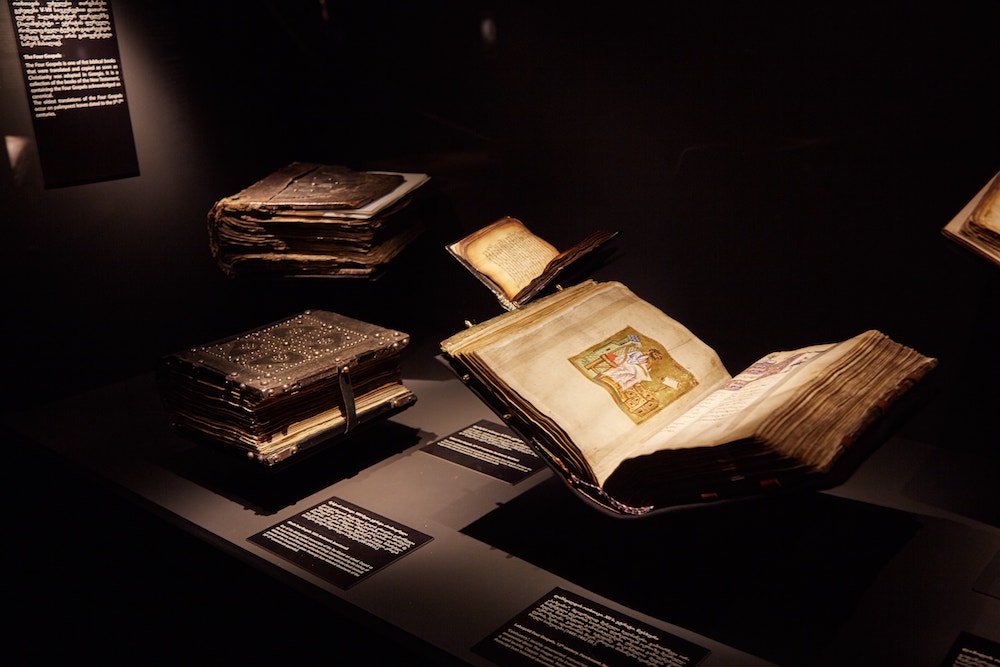
The Svaneti Museum is a well laid out and modern museum that rivals others of its kind in Georgia. You’ll find all sorts of artifacts from the Bronze Age all the way up to the Middle Ages.
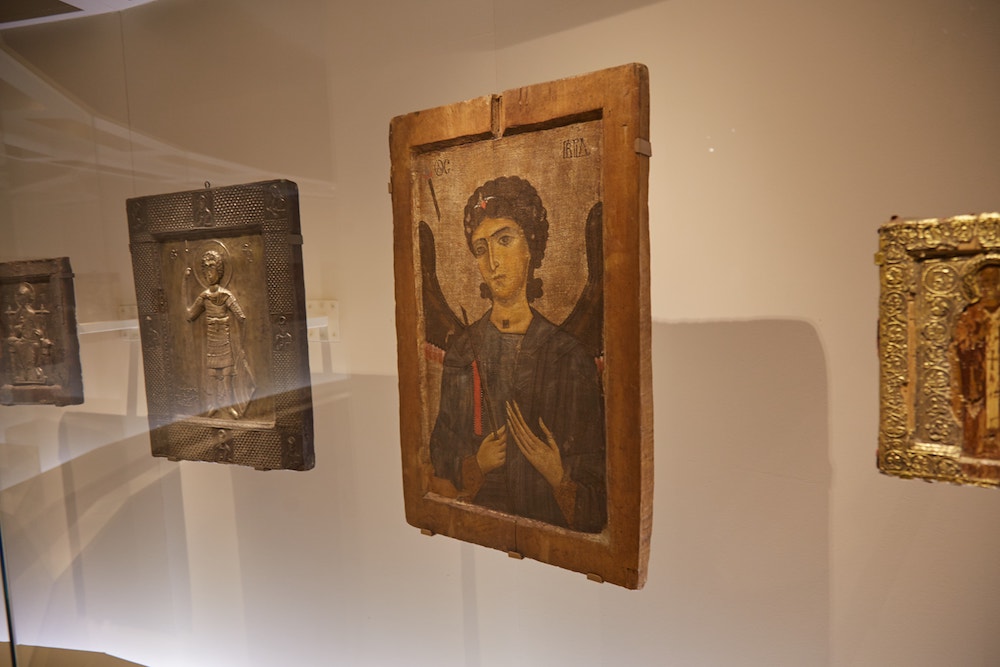
One of the most impressive rooms houses dozens of icons painted in the local Svan style, which is known for its unique and expressive painting technique. The icons usually depict the saints with wide open eyes.


Another highlight in Mestia is taking the ski lift up the mountain for some views of the town. It’s not far from the museum, but I was told that the ski lift was broken and that I wouldn’t be able to get up there. This turned out to be false information, but it was too late in the day by the time I realized.
I wasn’t too disappointed, though, as I knew I’d be getting plenty of awesome views in the days to come.
ACCOMMODATION: In Mestia I stayed at Irma Beso & Aleko Khergiani’s Guesthouse which I’d definitely recommend for budget travelers.
While not right in the town center, it’s still an easy walk. And, as mentioned below, you can get a head start on your hike by accessing the hiking trail via a path behind the guesthouse. The staff were friendly and helpful, and the meals were tasty. In total, I paid 30 GEL for a private room and two meals.
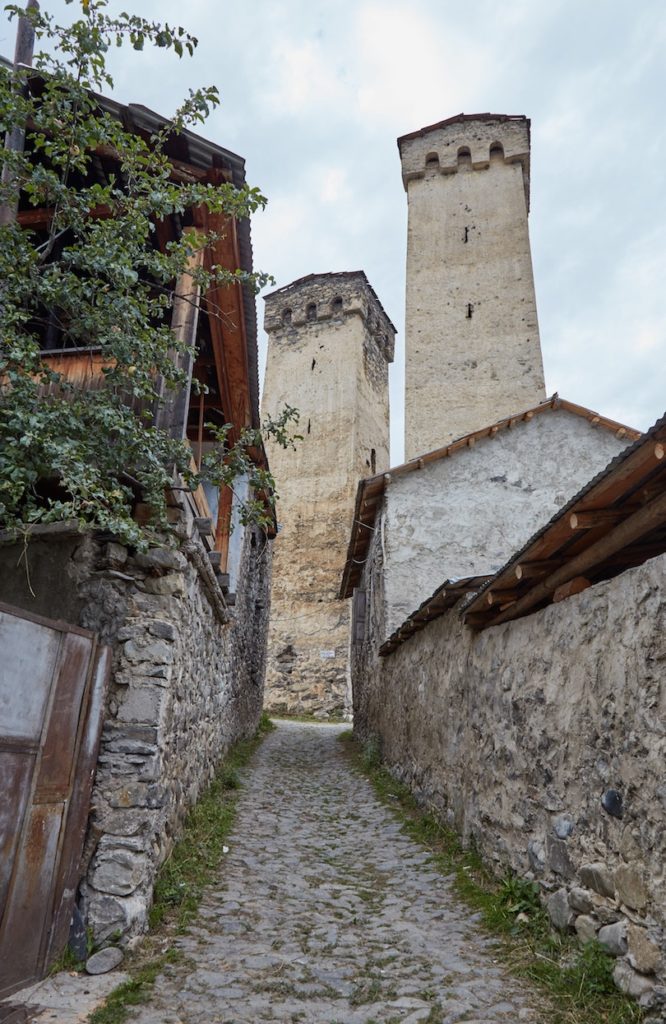
Day 1: From Mestia to Zhabeshi
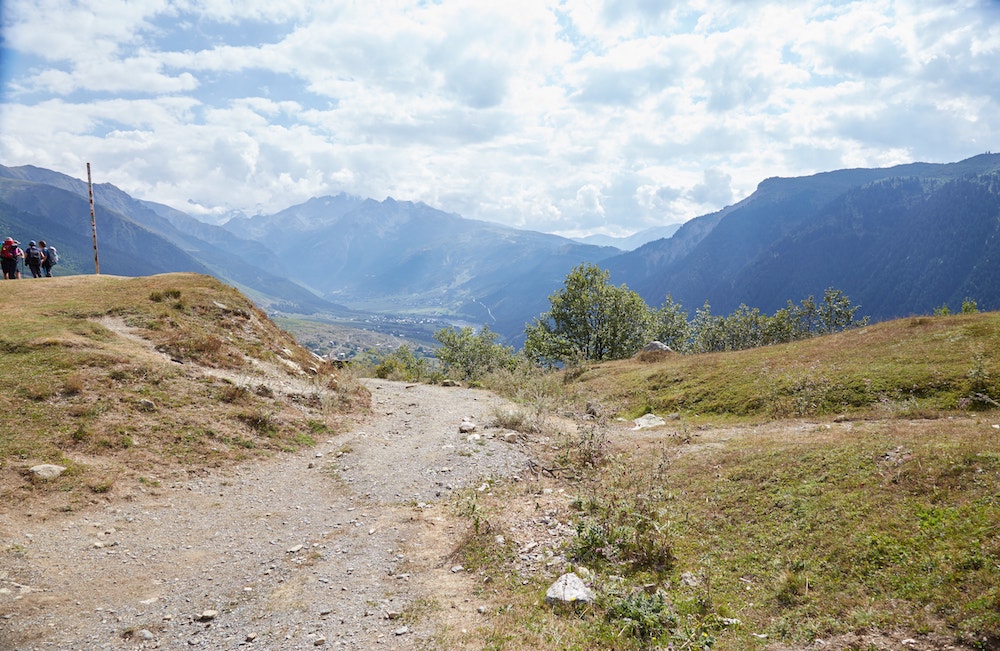
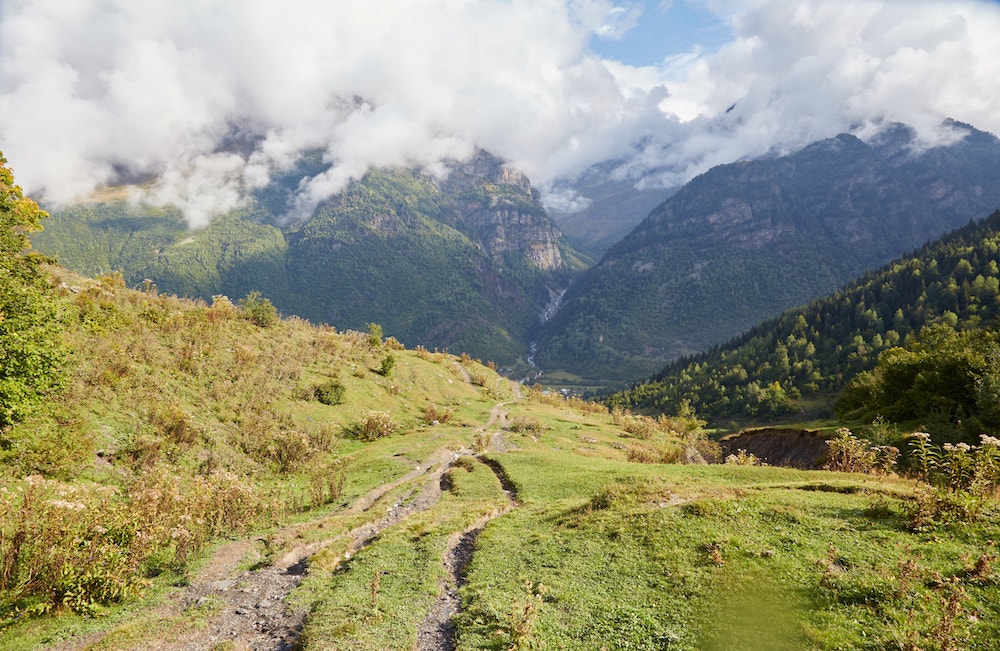
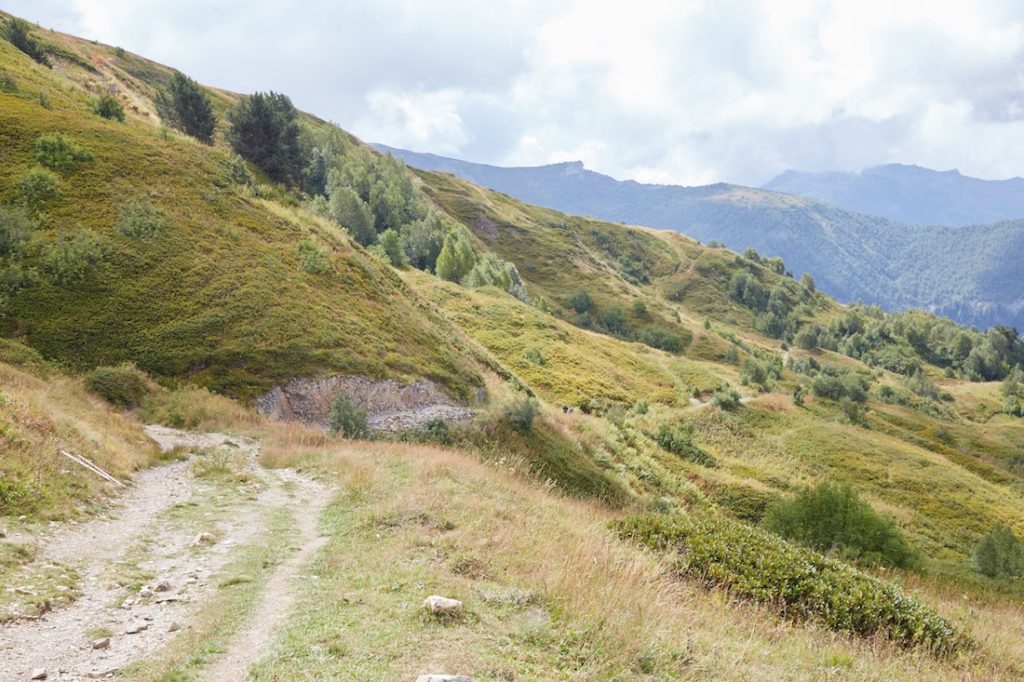
The trek from Mestia to Zhabeshi, which has an ascent of around 760 m, isn’t the most difficult in terms of elevation. It is, however, one of the longest and most confusing days of the journey. The trek is around 15 km in total and has numerous parts where the trail branches off in different directions. We’ll be covering them in more detail below.
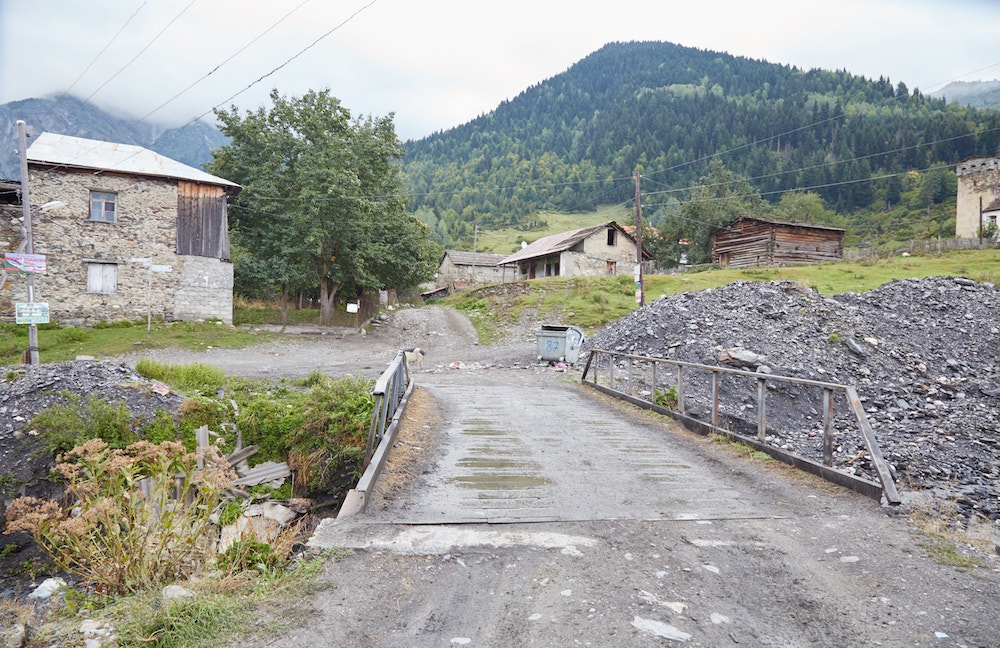
Having stayed at Irma & Aleko’s Guesthouse, I could access the start of the trail from right behind the building. For those staying in the center of town, you’ll first want to walk across the Mestia River. Then make a right down Avtandil Khergiani Street. Next, make a left on Revaz Margiani Street so that you pass Hotel Tetnuldi.
The beginning of the trail looks like a normal road, but just keep heading straight and uphill until you pass Hotel Banguriani on your left. Eventually, the paved road will transform into a dirt trail.

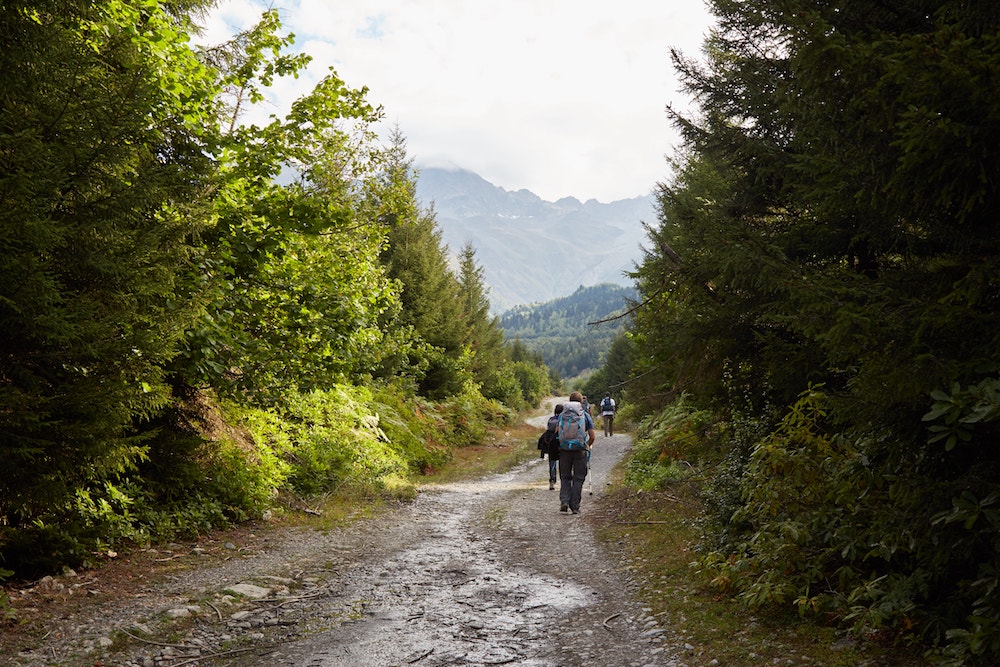
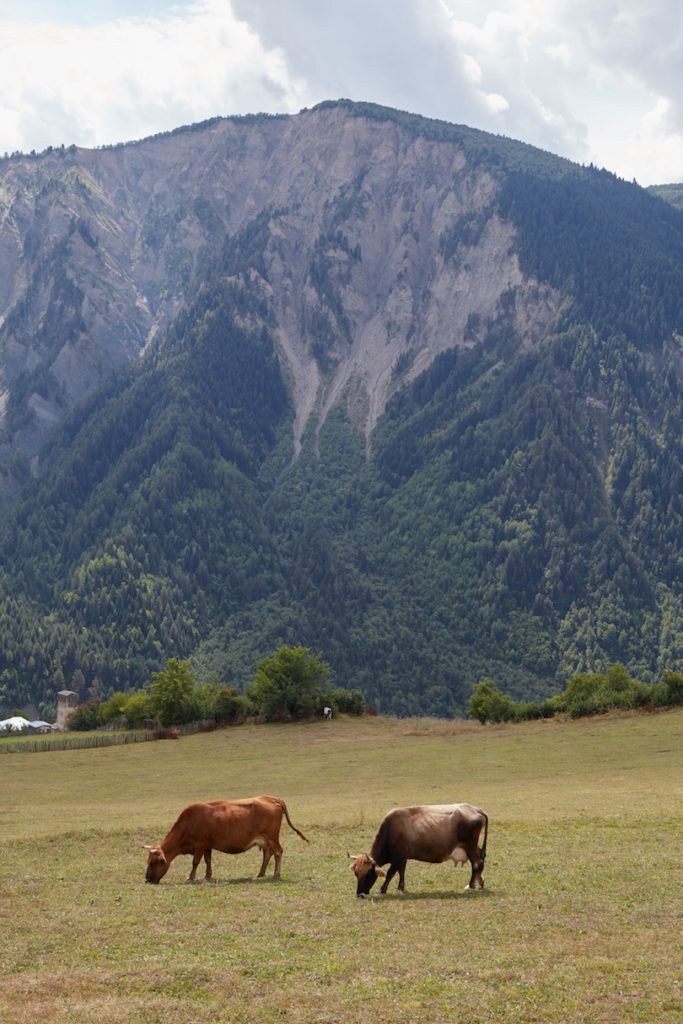
Walking further up the path, you’ll notice the town of Mestia getting smaller and smaller. The traffic will have disappeared, and it will be just you, some other trekkers and a few farm animals.

Eventually, you should see a small tower up ahead. It’s shorter and of a different style than the typical Svan tower, and there will be some rubble on the ground next to it. Don’t walk to it but take a right heading uphill.


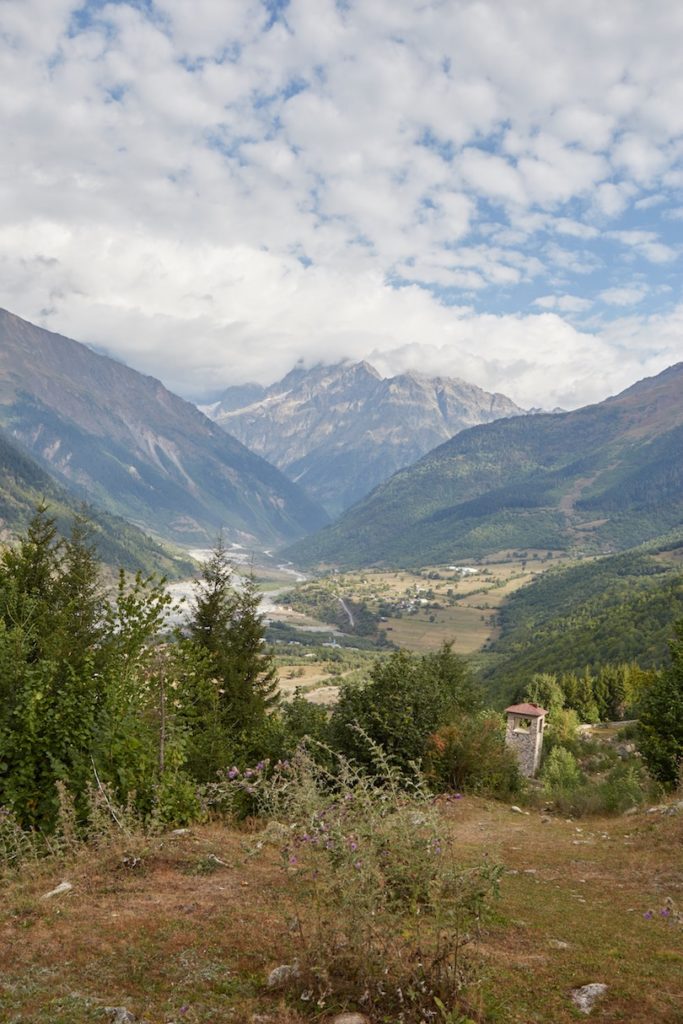
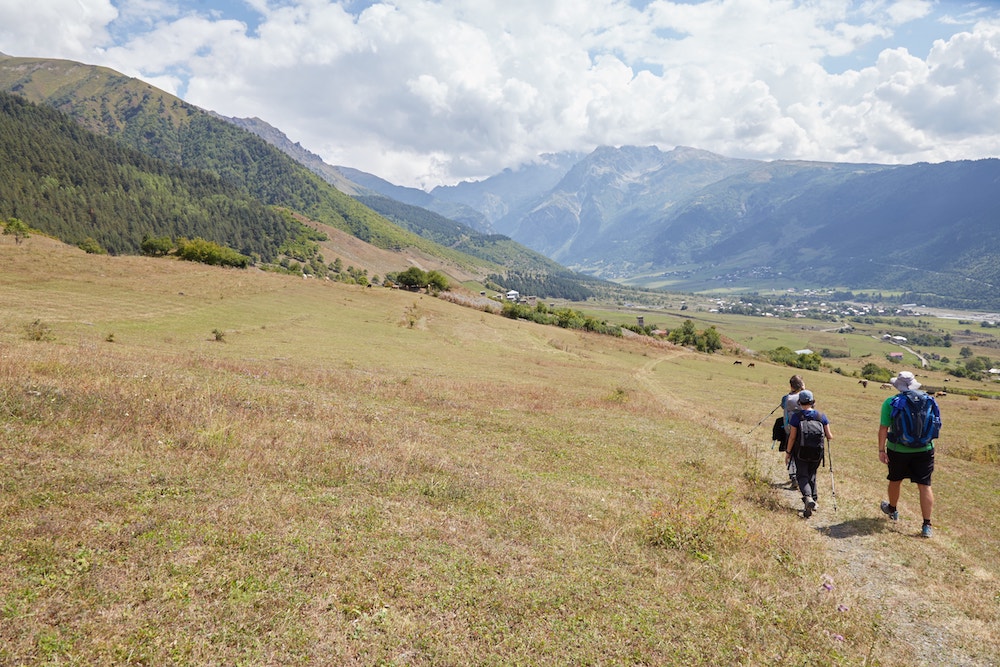
From here, the path is fairly steep but it’s pretty straightforward. And it’s especially scenic. The town will appear even smaller by now and the distant mountains will start come into full view. From this point, you’ll find yourself walking over open grass and occasionally through forested areas.


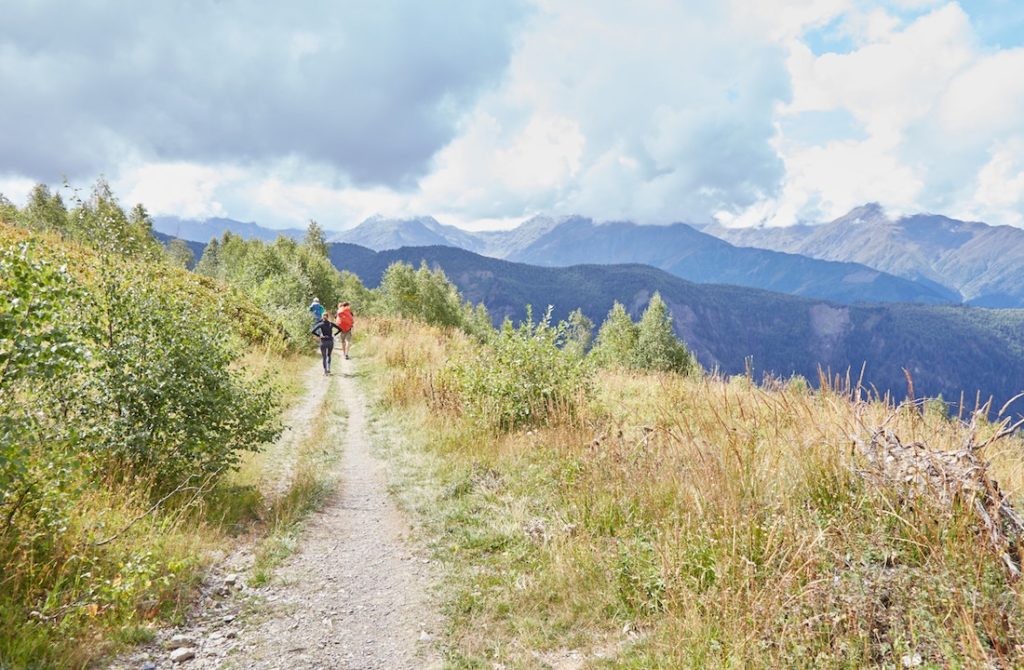
Eventually, after the uphill trek is finally finished, you’ll see a large meadow on your left. This makes for a good place to stop and relax for a bit. Take a sip of water, apply sunscreen and get to know some of the other hikers. You’ll likely be running into the same people again and again over the next four days.

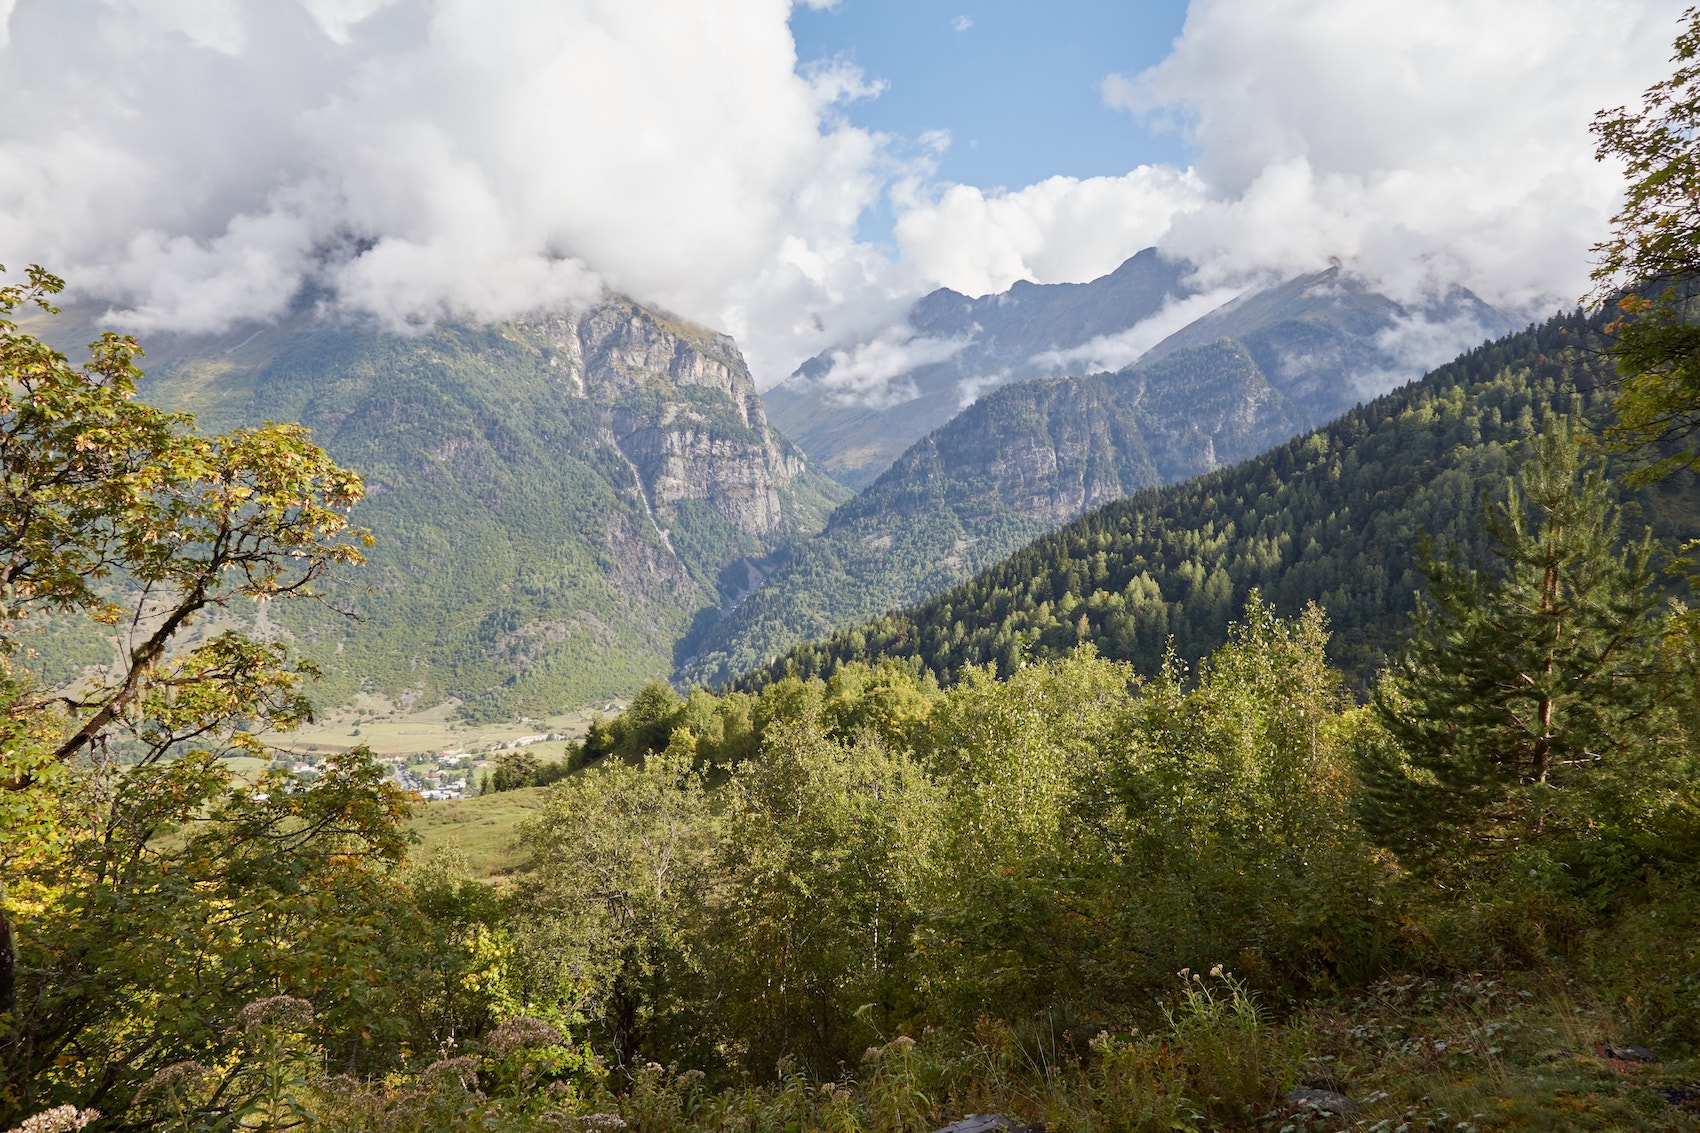
Back on the trail, you’ll now be heading south. And you’ll have some more great views of Mt. Ushba and Mt. Tetnuldi on your right-hand side. Supposedly, this is the highest point of the first day’s trek. However, the day is still just beginning.

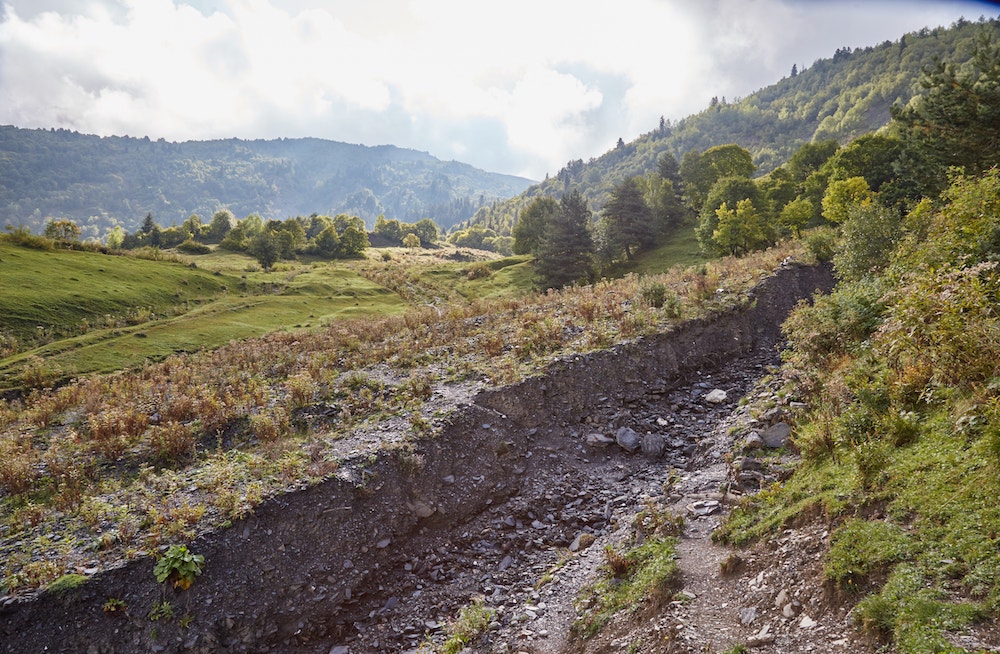
Eventually, you’ll make it to a section where the trail suddenly descends downward into a valley. And it was from this point that things got very confusing for both myself and other hikers that I met.
The Caucasus Trekking guide recommends taking the higher trail at the broken signpost for the best views. But after arriving at a broken signpost, we only saw a trail leading downwards. A few other hikers and I, unsure of what to do, found an alternate trail to the right. But it only took us to a dead-end in the middle of a grassy meadow.
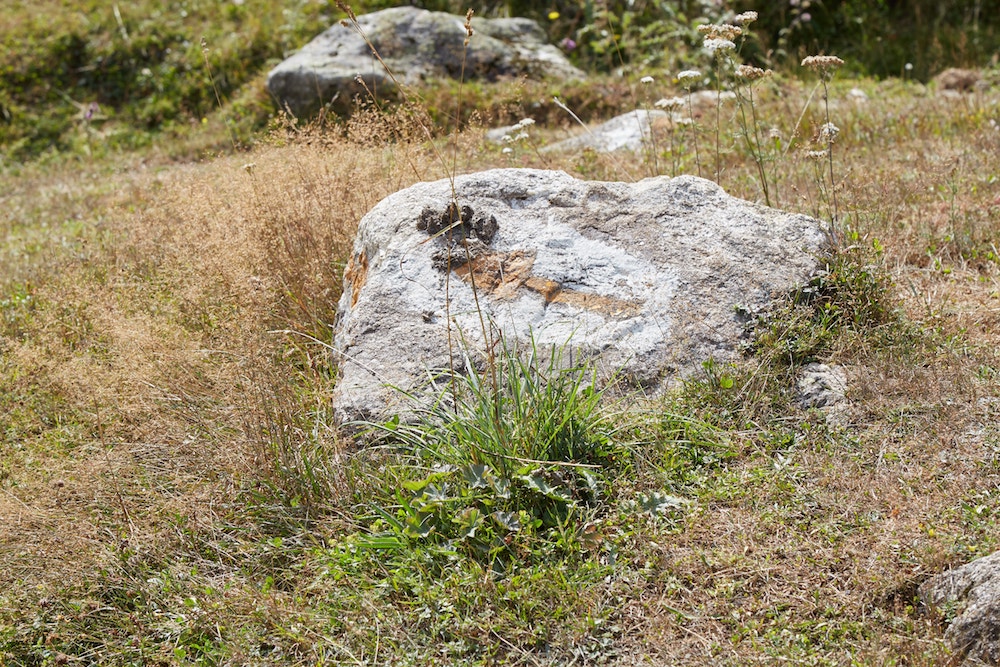
We then turned back and headed down toward the villages in the valley, as that was clearly the only option. Notice the arrow painted on the rock, which is there for good reason.
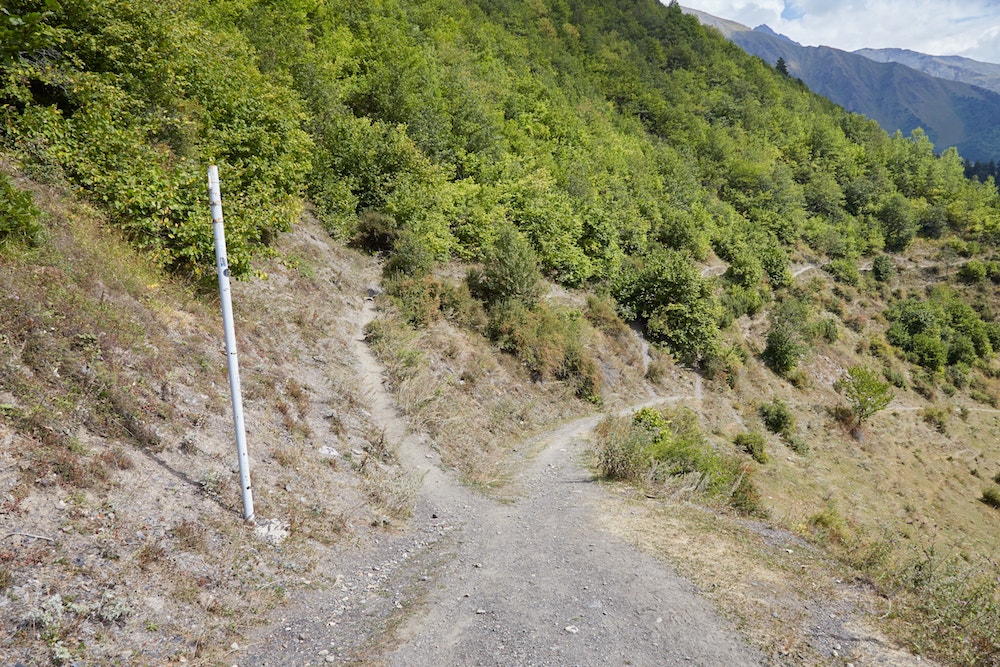
However, after appreciating the gorgeous views for awhile, the confusion was far from over. We encountered yet another broken signpost, after which the path clearly splits into two.
It’s surely this broken signpost, and not the previous one, that the Caucasus Trekking guide was referring too. And while it’s recommended to take the upper slope, it seemed to lead to nowhere. The wider trail leading downward, on the other hand, appeared much more like a proper trail.
Here I met up with a group of 5 or 6 hikers who were equally confused, and we stopped for awhile to discuss our thoughts. Ultimately, we chose the uphill, narrow path to the left, though we were prepared to turn back if things didn’t work out.


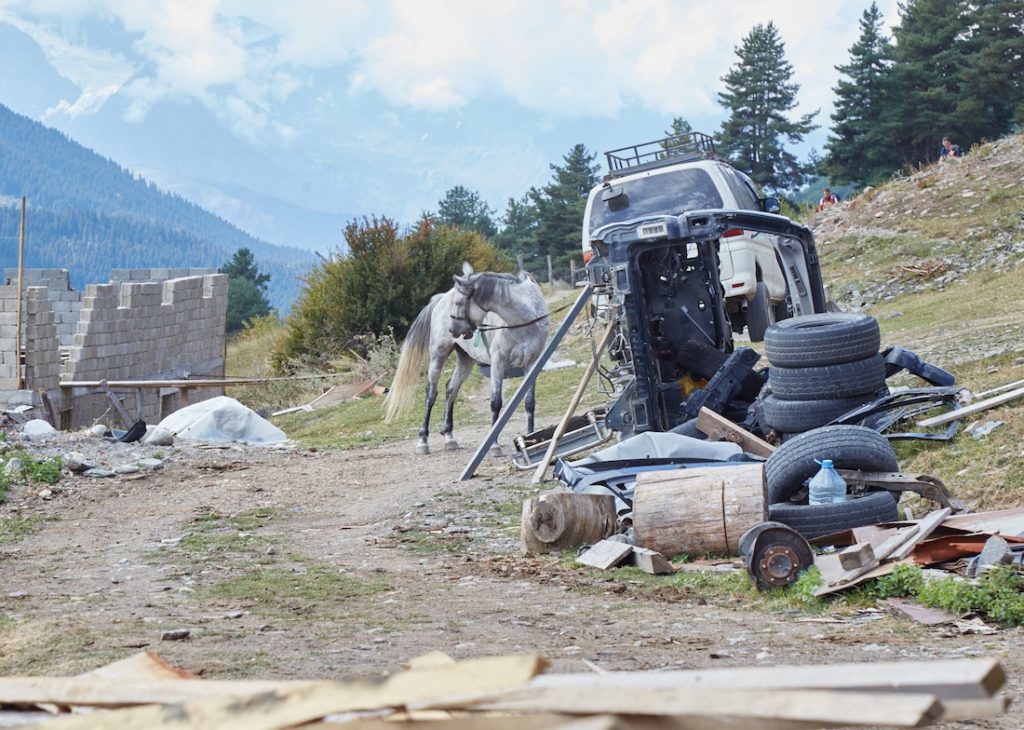
Walking uphill, we eventually arrived at a forested area. The trail continued straight ahead, and we passed by a small construction site that had a horse tied up to a dilapidated vehicle (it may or may not be there by the time of your hike!)
We later encountered a transmitter tower mentioned in the Caucasus Trekking guide, and a quick turn there would’ve taken us south to the main road which runs through Zhamushi Village.
But the group of friendly Spaniards I’d temporarily joined wanted to continue walking straight ahead instead of turning at the transmitter tower. And so I decided to tag along, even if this isn’t how I would’ve done things if I were alone.
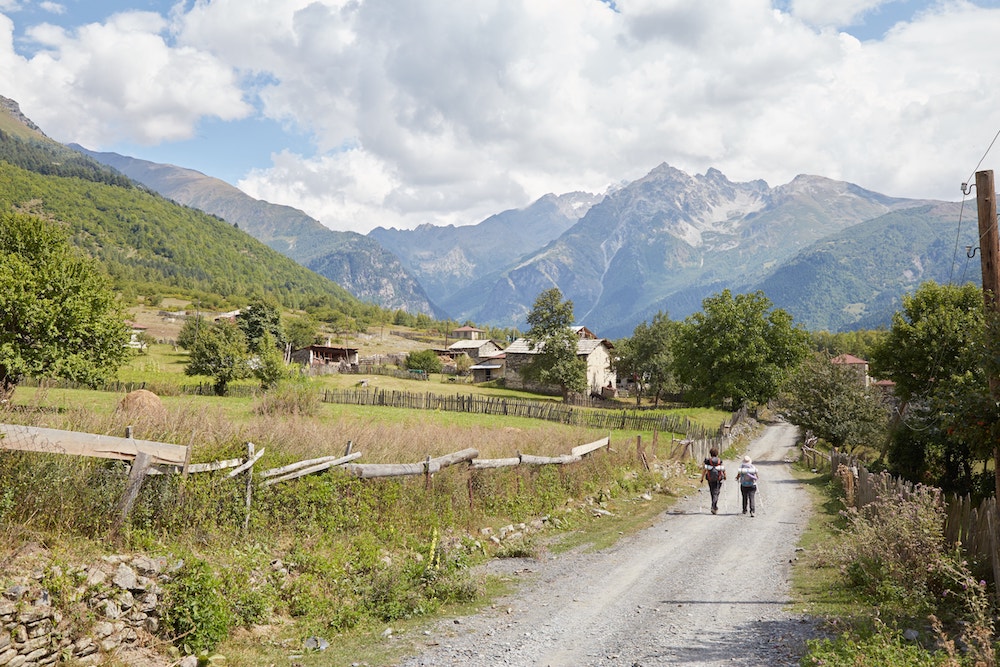
Just as it seemed like we’d made an OK choice, the trail slowly began to fade away into the grass. Eventually, we found ourselves walking through the middle of a grassy meadow outside a village called Lakhiri. The village is not mentioned in any guides, and even when looking on Maps.me, the trail to Lakhiri disappears! (It is, however, definitely walkable.)


We walked through the charming little village and then made the right turn toward Zhamushi. And from there we made a left, heading east toward the next village of Cholashi.
By now you’ve probably realized how confusing things can potentially get on the first day. But on the bright side, even if you take the ‘wrong’ path, it won’t be difficult to make your way back to the main trail/road. And fortunately, all of the next three days would turn out to be much less confusing than the first one.
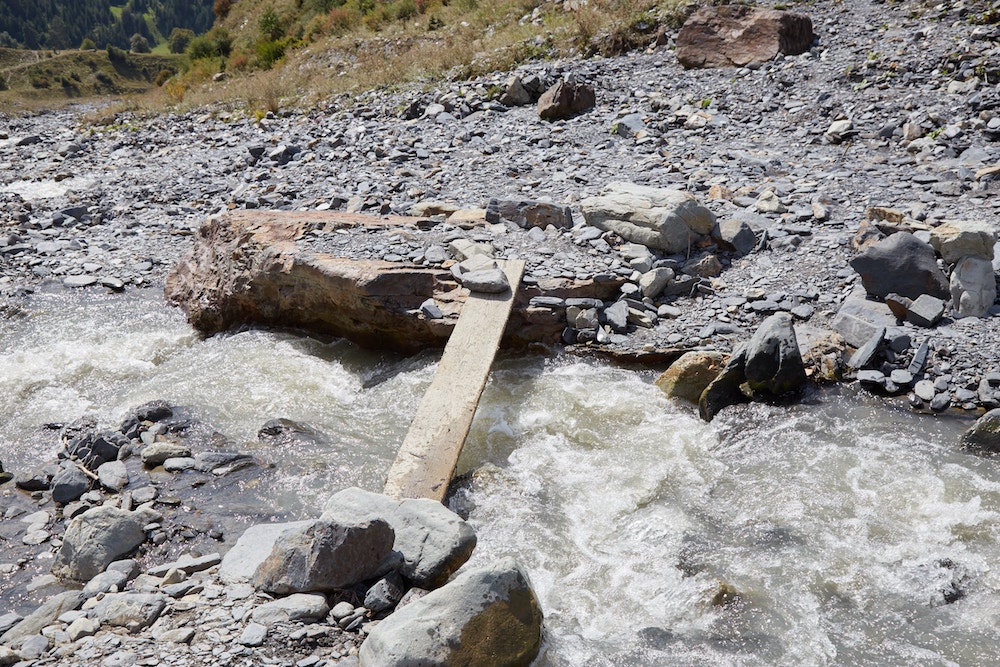
At some point, we had to cross a small river by walking across a wooden plank. Passing by a small restaurant, the group of Spaniards chose to stop for a quick snack. I wanted to keep pushing on, however, and decided to continue walking on my own.
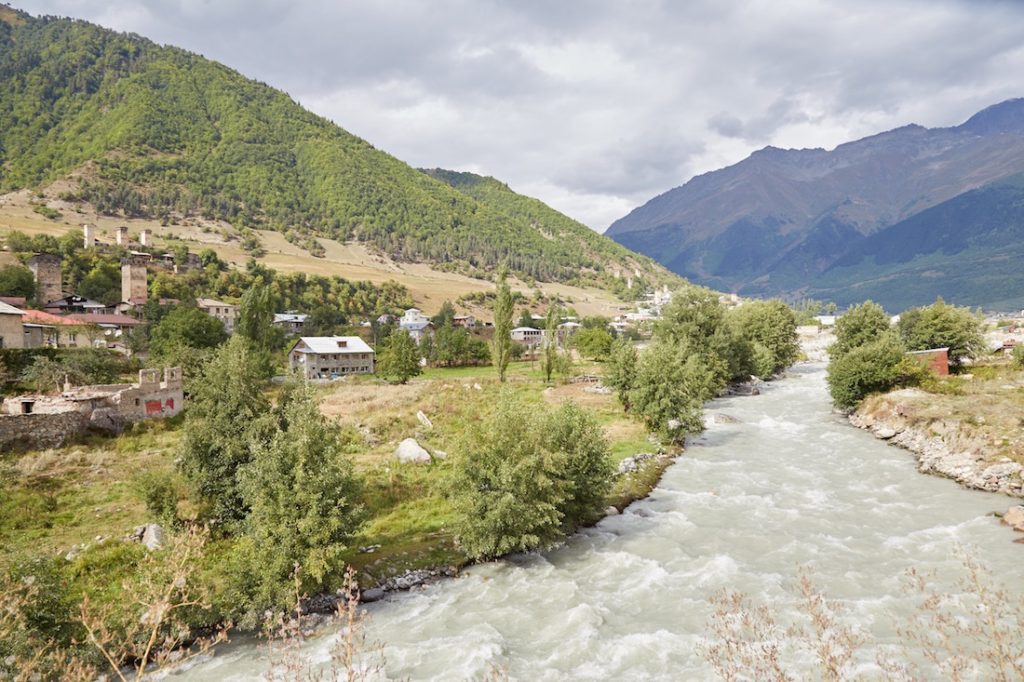
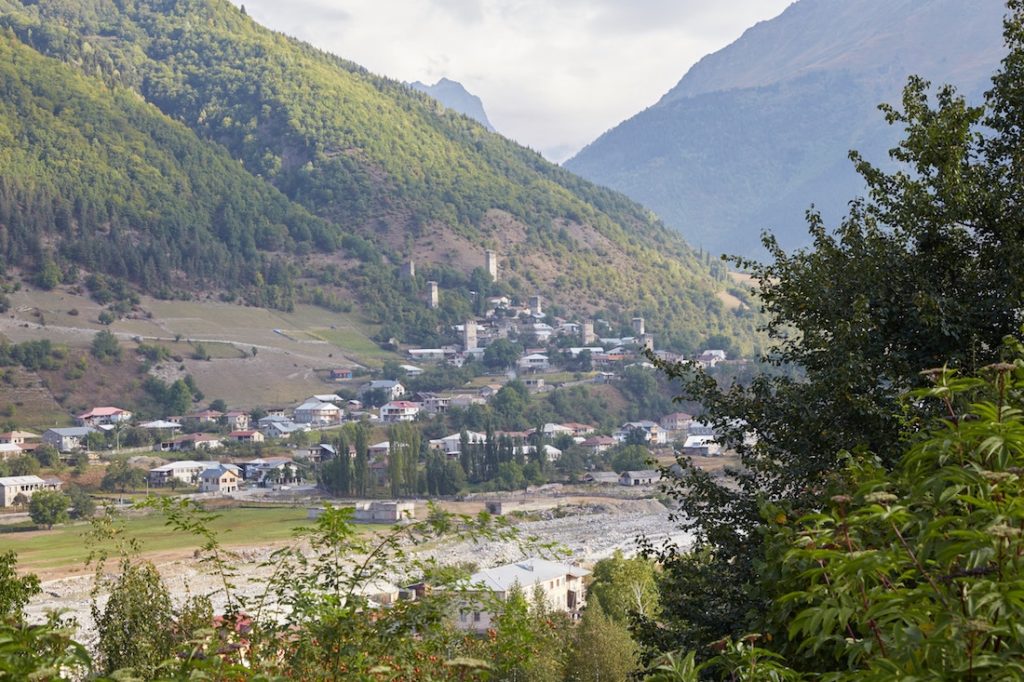
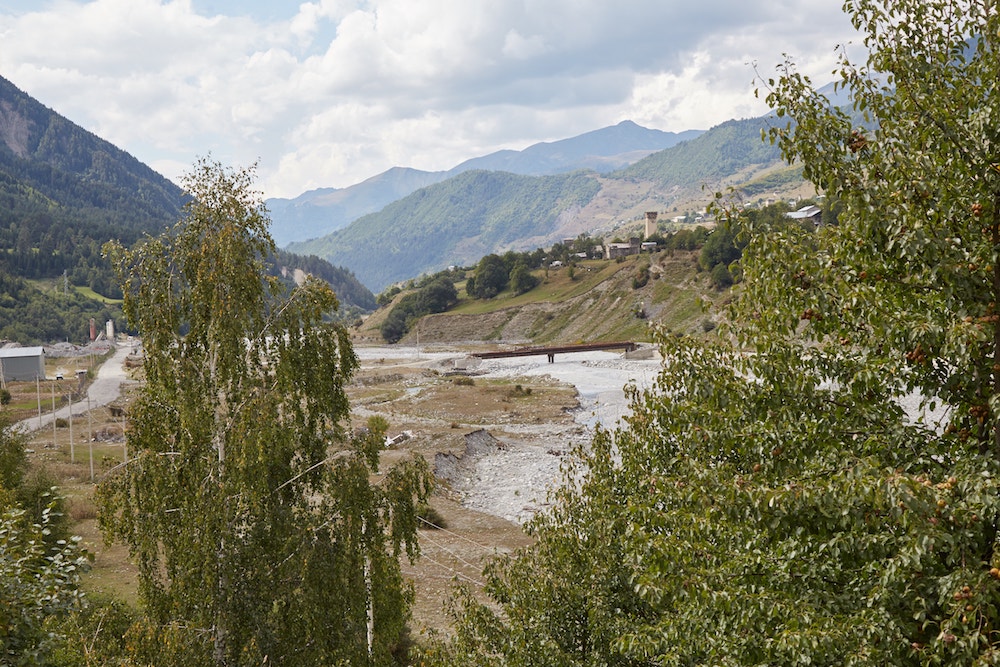
I walked through the rather unremarkable village of Cholashi and before long, the Mulkhura River came into view.
Just on the other side of the river were the villages of Chvabiani and Zhabeshi, my final destination. I noticed a bridge leading to the other side. However, I’d read on both the Caucasus Trekking guide and some other web sites that one could keep walking on the left-hand side of the river before taking a later bridge. Supposedly, this route was supposed to be more scenic.

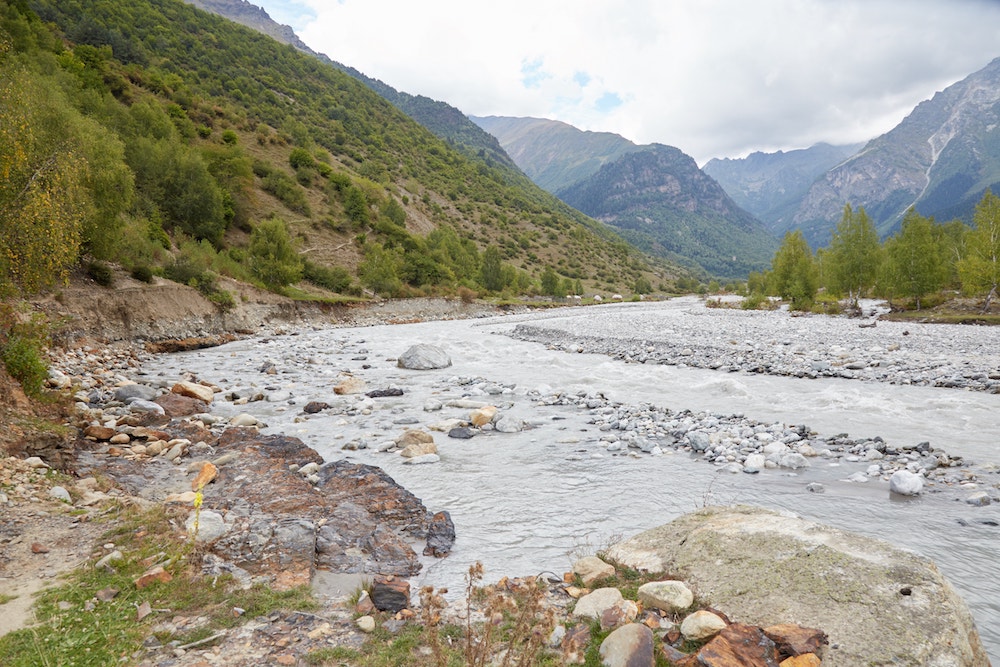
And so that’s what I tried, but eventually, after 10-15 minutes of walking along the river, I reached a dead end. The trail ended and there was no other bridge in sight.
I could, however, see what resembled a small, narrow trail along the side of the mountain. I then climbed up on some large rocks in an attempt to find it. But I only encountered a sudden steep drop of about 2.5 meters. No way was I going to jump down from there with my heavy backpack, just in hopes of finding a more ‘interesting’ trail.

And so I headed back toward the bridge I’d originally seen. And on the way, I ran into quite a few other hikers who were about to walk along the same dead-end trail I’d just come from.
I was able to warn them, and I met many other trekkers over the next few days who got stuck at this same part. Supposedly, there once was a bridge in this area but it’s since been destroyed.
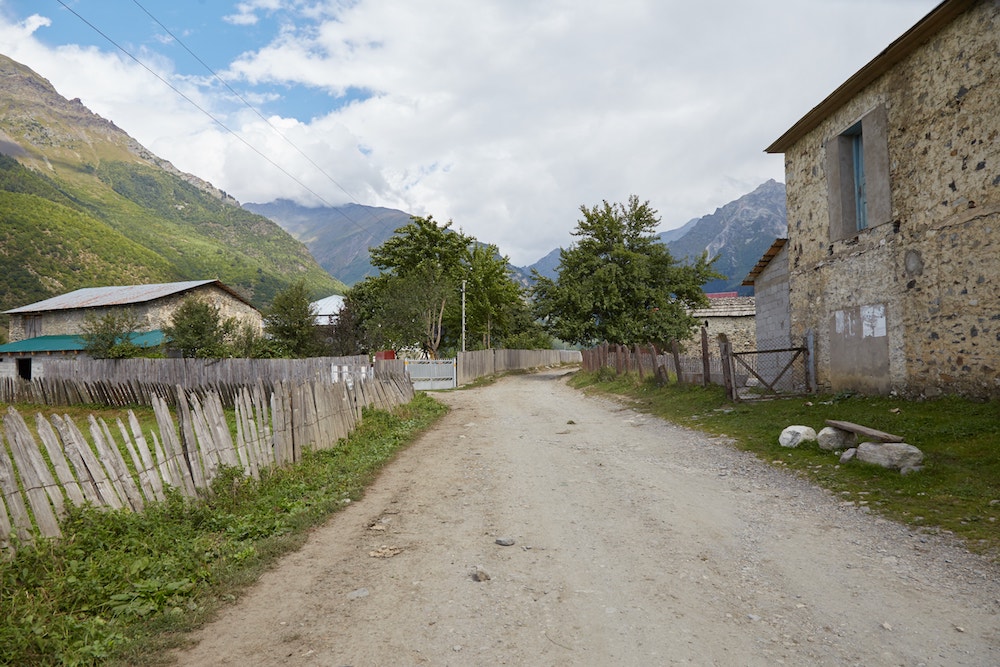

And so we walked through Chvabiani Village and just had to keep walking straight toward Zhabeshi. This was my first experience trekking with such heavy luggage, and by this point, my shoulders were killing me. I was quite relieved, then, to encounter my guesthouse about 10 minutes before central Zhabeshi.
I’d started hiking that morning at 8:30 am and arrived in Zhabeshi at 15:00. I checked in, waited for dinner that and then had a long, deep sleep.
ACCOMMODATION: In Zhabeshi, I stayed in a private room at Guesthouse MAMUKA. I happened to be the only guest staying there, but Mamuka and her family were helpful and accommodating. Eating dinner alone while the family was just hanging out and watching TV was a little bit awkward, though.
As mentioned above, the guesthouse is just west of Zhabeshi’s town center. I only had a little bit of extra walking to do the next morning which was no big deal at all. In total, I paid around 40 GEL.
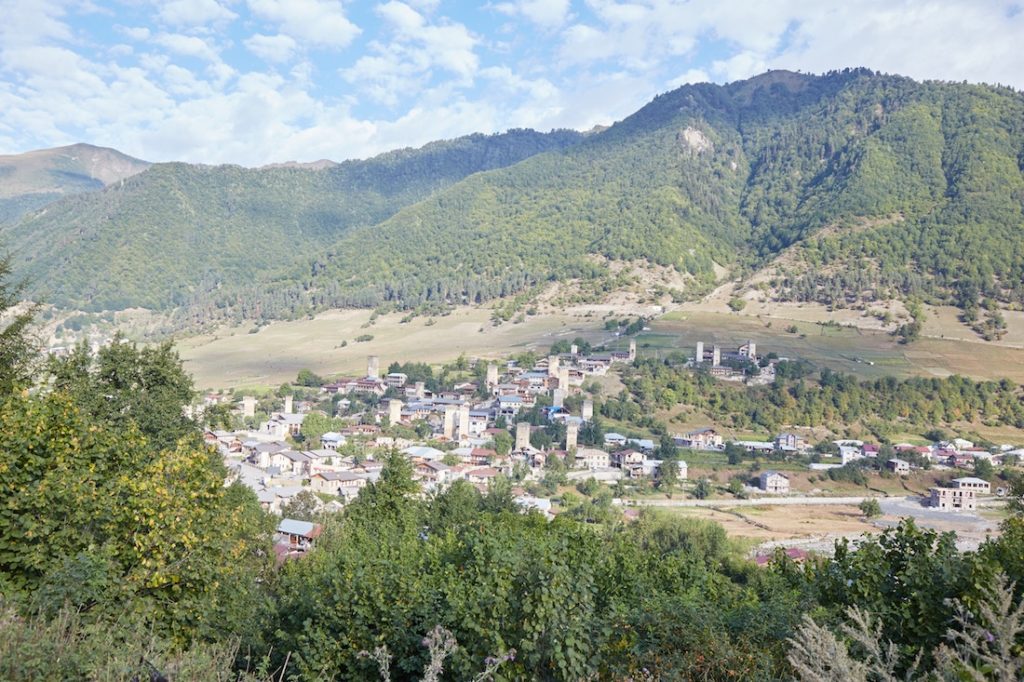
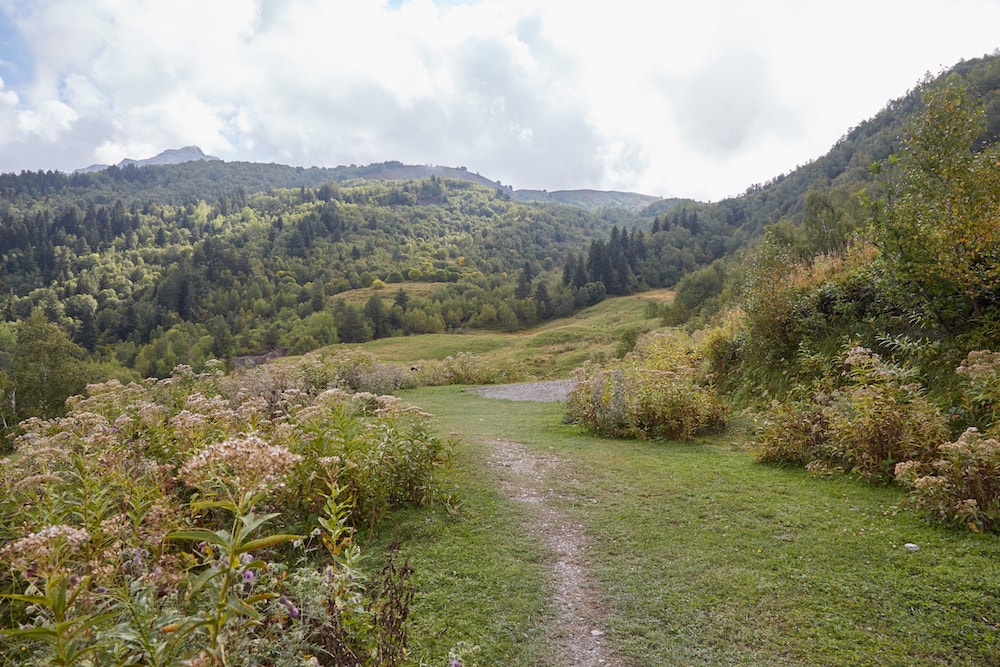
Day 2: Zhabeshi to Adishi
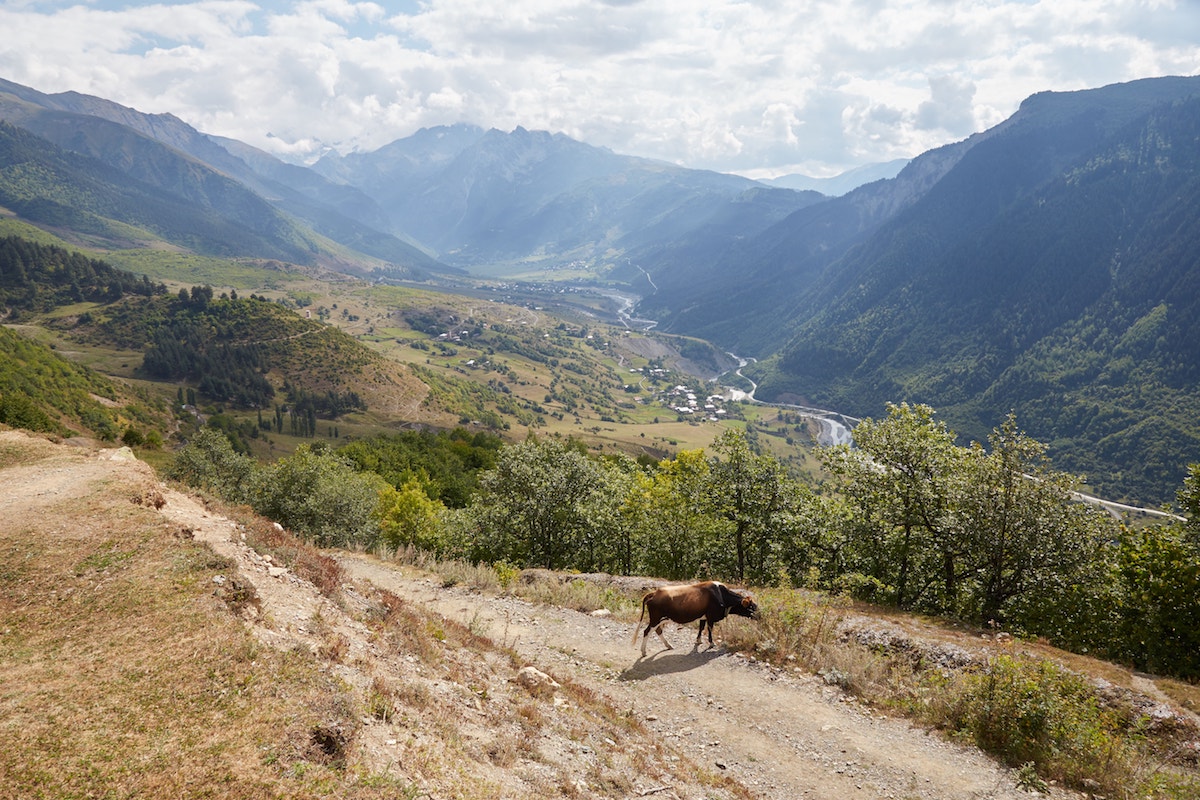
The second day of the trek, from Zhabeshi to Adishi, is both the steepest (an ascent of over 900 meters) and the shortest (10.6 km). After the long and overly confusing first day, I was relieved to encounter a simple and straightforward trek, even if it was a bit steep at points. And despite being so far from Mestia, this portion of the trail was much better signed.

Starting in the center of town, you’ll want to cross the small bridge over the river and then make a right, heading south. You’ll then be walking uphill along the shallow river. Eventually, the trail will lead you to a part where you can just step over the stream. From here, head west and continue heading uphill.


After heading in the southwest direction for awhile, you’ll get to a meadow where the trail branches off in two directions (marked as the ‘Junction’ on the Caucasus Trekking GPS Map.) Be sure to head left (east). This is one of the few slightly tricky parts of the day.
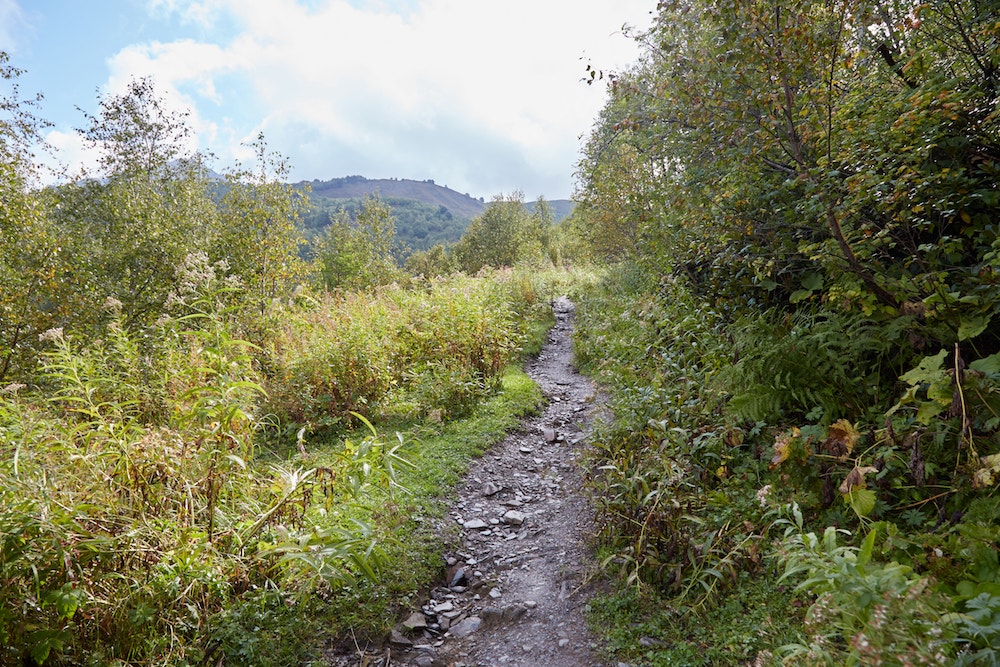
The trail gets steeper and steeper from this point, and you’ll likely need to stop a couple of times to catch your breath. Luckily, the views are spectacular at this early part of the trek.
The trail is not always 100% clear, and there’s one confusing part where the trail seems to end. But just walk across the dried-up riverbed and the trail will soon reappear.
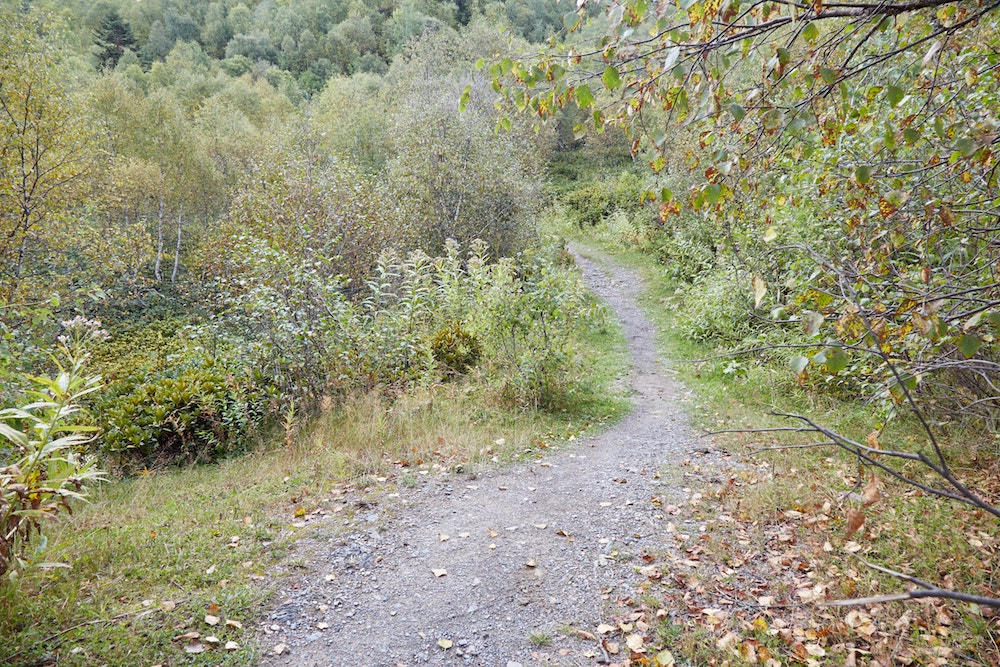
The trail will remain steep for some time to come, and you’ll soon find yourself in a forested area. While there’s not a whole lot to see at this point, the trees provide some much needed shade on hot days.
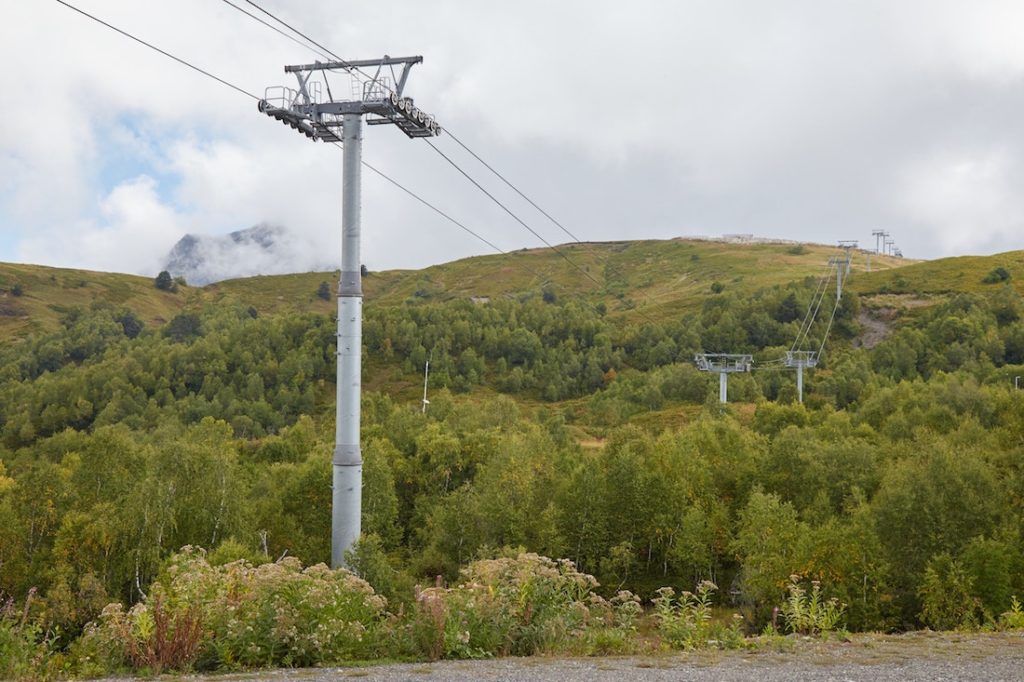

Finally, exiting the forest after a couple of hours into the hike, you’ll come across a road and a ski lift. Be sure to turn left (east). Supposedly, there is also an upper trail you can take to get to Adishi, but I took the lower, more straightforward route. This also seems to be the much more popular option.
I soon came across a handmade sign indicating the direction of Adishi. While it didn’t match up exactly with the GPS trail, I think it’s always a good idea to trust the signs put up by locals.

Sure enough, this trail took us right where we needed to go. We also passed by a small snack stand where numerous trekkers had stopped to take a rest. Still full from breakfast, though, I decided to keep on walking. And I also noticed some gray clouds forming in the sky above.
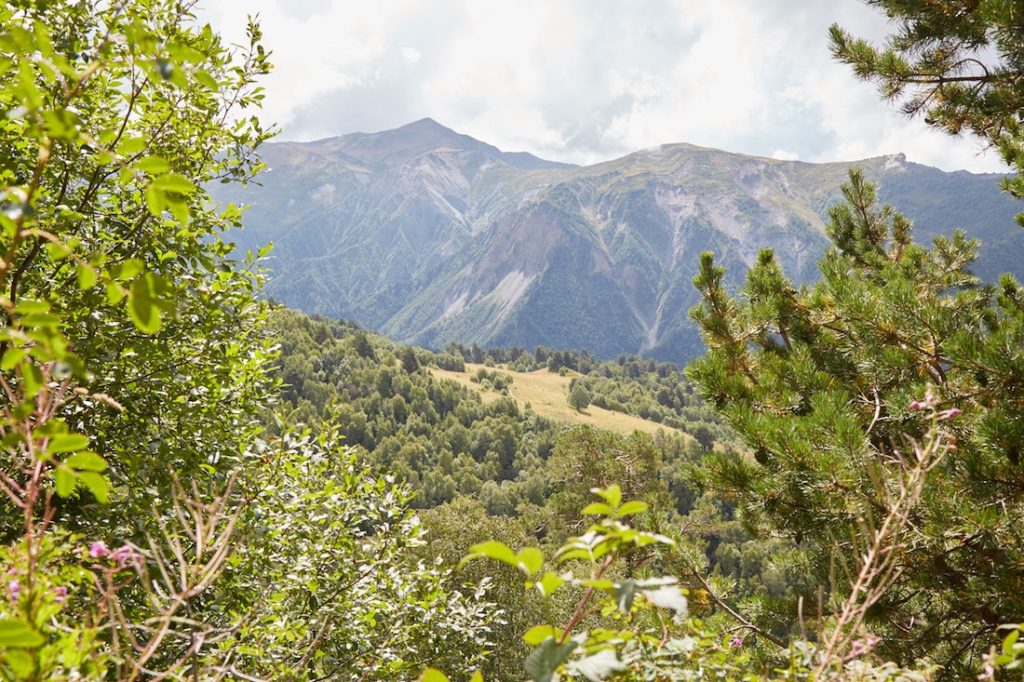
The scenery here was stunning, and I could relax knowing that the hardest part of the day was already over.
But it soon started to drizzle, and I began to pick up the pace. Before long, I found myself in another forested area which zigzagged downhill. While the path from this point onward would continually twist and turn, there was no confusion as to where to go.

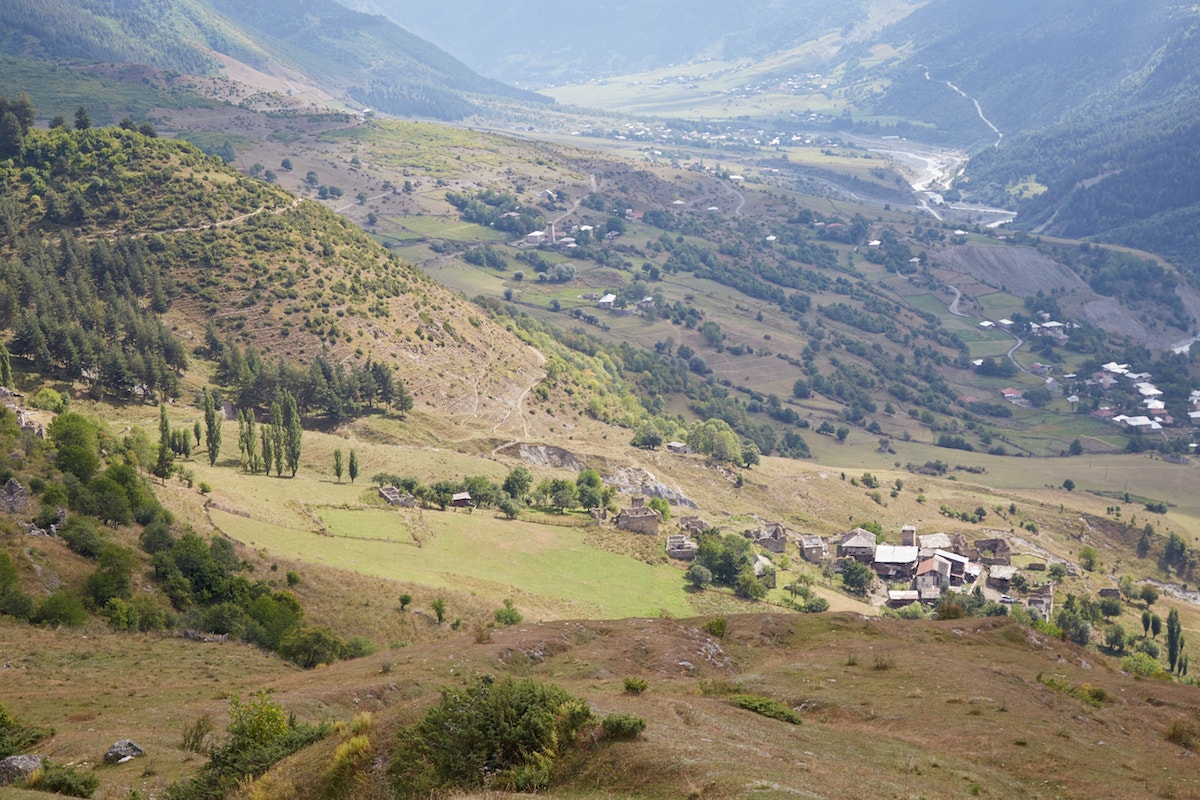
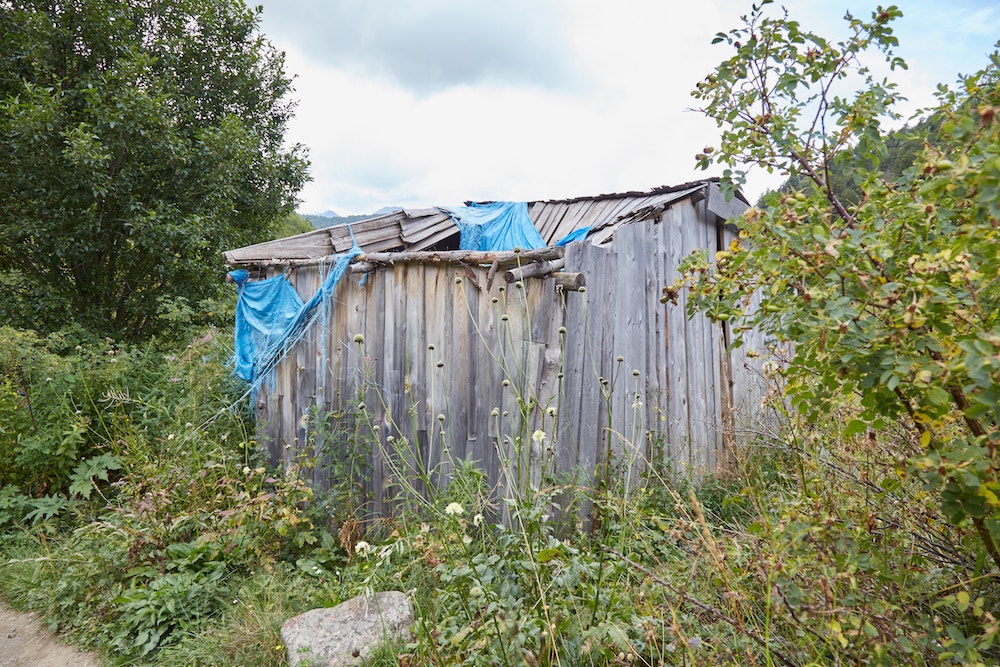
Coming out of the forest and further downhill, I passed by a dilapidated shack and a small muddy river. Thankfully, the drizzling subsided for awhile, and I continued making my way downward toward Adishi. The village, however, was not yet in sight.


Eventually, I arrived at a sign pointing trekkers in the direction of Adishi. But this is only one of two options taking you there. You can walk down this first trail which has you entering the village from the west side. Or, you can keep walking straight, eventually entering Adishi from the northeast.
While I had a guesthouse reservation, the location wasn’t marked on Maps.me or Google, so I just decided to enter Adishi from the west.


The path down to the village was surprisingly steep. I was really glad I had my trekking poles and a decent pair of shoes. If you’re not a fan of downhill trekking, then this very final stretch could be considered the most challenging part of the day!


Eventually, I managed to make it to flat ground without tumbling over. I walked into the village and asked some locals where I could find my guesthouse. Sure enough, it was on the opposite side of the village. But Adisihi is small enough that it really didn’t matter.
I made it to Adishi at around 13:30 in the afternoon, upon which I enjoyed a coffee and a shower. And not even thirty minutes had passed before it started pouring down rain, a storm which would last for most of the afternoon. I felt very fortunate to not have been stuck in such weather, though I wouldn’t be as lucky the following day.

ACCOMMODATION: Adishi is the most isolated village you’ll encounter while trekking from Mestia to Ushguli. As such, accommodation prices are the most expensive here. And this also seems to be where hikers have the most complaints.
Unlike the other villages, most Adishi guesthouses aren’t on Booking.com yet. But I looked through all the reviews of the ones on there, and many had some alarming complaints. Some guests complained of the hosts having late-night parties until 2am, while other guests said they were forced to sleep on the sofa!
That’s why I was relieved to come across Panorama Guesthouse, which had all positive comments. And my experience also turned out to be positive. Due to the prices of Adishi, this was the one place for which I booked a dorm room instead of a private room. However, it was just myself and a friendly couple who I’d met earlier on the trail.
Dinner was tasty and the owner, Tamara, spoke fluent English. She even gave us all some food for the next day on our way out.
Additional Info
Getting to Mestia from Tbilisi is a long, tiring journey. First you will need to buy a train ticket from Tbilisi to a town called Zugdidi. Two trains leave per day – one departing at 8:10am and the other at 21:45. For most people, taking the night train is ideal.
I booked a first-class (‘Soft seated’) train ticket for 35 GEL. While you can go buy them at Tbilisi Central Station in advance (just outside Station Square Metro), it’s easiest to purchase via an app called Matarabeli.
While I’m certainly no luxury traveler, at the very least I was expecting there to be sheets. But nobody ended up coming around with them, and this was also the case for the ride back. Even the second-class trains in places like India and Thailand provide sheets, so I was pretty surprised by this.
Furthermore, there’s no electrical outlet inside the cabin itself, but only in the hallway outside. And there’s no way to buy snacks or water anywhere on the train, but I was already aware of this in advance.
Aside from having to sleep directly on top of the dirty seat, I wasn’t a fan of all the people smoking. Officially, trains are non-smoking, but this is Georgia, so don’t be surprised if your train reeks of cigarettes for the entire ride.
Somehow, though, I was still able to sleep fairly well. Upon arrival in Zugdidi at around 6:00am, the marshrutka drivers will approach you immediately upon alighting the train. The ride to Mestia costs 20 GEL and lasts 3-4 hours.
The ride can be rather nausea-inducing and the vehicle is pretty much always packed to capacity. Some people opt to take a marshrutka all the way from Tbilisi to Mestia, but I couldn’t imagine being stuck on one of these things for 10 hours.
Originally, I was thinking of taking the early morning train, but I read that there might not be minivans to Mestia in the afternoon, especially if the train was delayed. But now that the trip is over, I’m glad that I took the overnight train regardless. Arriving in the morning, I was able to take a quick nap before exploring Mestia. Had I arrived in the late afternoon, I probably would’ve been just as exhausted but with much less free time to explore.
It’s also possible to get to Mestia from Kutaisi via minibus, which will be a considerably shorter journey. Furthermore, it’s even possible to fly directly to Mestia from Tbilisi, though flights are often sold out and they commonly get cancelled due to bad weather.
There are lots of guesthouses to choose from in each village, and booking accommodation isn’t absolutely necessary. However, I decided to book accommodation in advance for each village and was glad that I did.
This allowed me to know exactly how much cash to bring for the hike. There are no ATM’s after Mestia and guesthouses won’t take cards, so it was convenient to know how much I’d spend in advance. With that said, it’s a good idea to bring enough for an extra night or two in case horrible weather happens to disrupt your hike.
Something you should be aware of is that the prices the owners quoted me wasn’t always the same as the prices listed on Booking. Sometimes it was a bit more, but sometimes it was even less! I think this has to do with confusion about the web site’s pricing options.
Another benefit of advance booking was having a place to check-in to right away. It was great being able to set down my bag at the end of each hike without having to shop around and compare the different options. Furthermore, a lot of guesthouses are run by regular families who aren’t experienced in the hospitality industry, so opinions are often mixed. That’s why I found it useful to read reviews in advance.
If you’re bringing all your stuff with you to Mestia, you’ll likely be able to leave what you don’t need at your hotel and pick it up upon your return.
BACKPACK: You’re going to be carrying your backpack for 4 days straight, so you’ll want something that’s comfortable and that won’t fall apart during the trek. Most people take typical trekking backpacks with adequate shoulder and waist support.
I, on the other hand, just took the large backpack I use for all of my trips. It’s called the Eagle Creek Gear Hauler and it’s not specially designed for long-distance trekking (though it is mostly waterproof). My shoulders suffered a bit throughout the hike, but I have no regrets about not buying a new bag. The reason I really like the Gear Hauler is that it’s been designed to fit as a carry-on bag, which is very important to me as a frequent flyer.
SHOES: Overall, the hike isn’t too extreme, and some people complete it in regular tennis shoes. Many people I met, however, complained of blisters. Also, you may want to consider getting something waterproof in case of rain or if you accidentally step in a puddle.
While I’m far from being an expert on hiking shoes, these shoes by North Face really came through for me. It was almost like walking on pillows, and I never developed a single blister. I was also hiking with two missing big toenails after my grueling Gergeti Glacier hike, but it was hardly even an issue. You can find them at the Magellan sporting goods shop in Saburtalo, Tbilisi.
RAINCOAT: A raincoat is a must. Even if it rains just once, you’ll surely need it. In case you get stuck in a downpour, also bring a dry bag for your camera and electronics.
CLOTHES: Even if you’re hiking in summer, it can get pretty cold at night and in the early morning. That’s why it’s best to bring at least a couple of long-sleeve shirts.
Also be sure to bring fresh backup clothes in case you get soaked or muddy. They might also come in handy for sleeping if your hotel lacks heat.
Don’t bring too much, though, as you’ll have to carry it all around with you for at least four days!
TREKKING POLES: This was my first time ever using trekking poles, and I was very glad that I got them. As it was also my first time trekking with such a heavy backpack, the poles really helped ease some of the pressure on my back.
Furthermore, the poles came in handy when walking down steep inclines or over small rivers.
If it’s your first time using trekking poles, I’d recommend watching some YouTube instructional videos on how to properly carry and walk with them.
The cheapest trekking poles I found in Tbilisi were at the Sports Master shop south of Vera Park. I believe I got the pair for around 80 or 90 GEL. (While the service there is good, do not buy shoes from them!) You can also probably find trekking poles in Mestia as well.
CAMERA: If you’re hoping to take lots of photos throughout your trek, think twice before bringing all your gear. Not only will extra lenses weigh you down, but it’s just not practical to stop and constantly change lenses throughout this kind of trek.
I trekked the whole time with my DSLR hanging from my neck, and I only brought my most versatile lens (24-105mm) as opposed to bringing 2 or 3 like I usually do. I feel that this was the best choice and I’d recommend other photographers do the same.

Pin It!