Last Updated on: 25th May 2025, 03:25 pm
Known for its ever-changing scenery, breathtaking mountain views and picturesque lakes, many consider Sky Pond to be Rocky Mountain National Park’s flagship hike. Not only was this my favorite hike at the park, but the Sky Pond hike is up there with my favorite treks of all time.
In the following guide, we’ll be covering everything you need to know to prepare for this epic hike, including permits and packing. We’ll then be covering exactly what to expect from the hike itself, including the infamous waterfall scramble.
And for more general info about accommodation and entry fees, be sure to check the end of the article.
About This Hike

THE BASICS: The hike to Sky Pond is an out-and-back hike that stretches out to about 8.6 miles (13.84 km) and with a total elevation gain of 1,774 ft (541 m).
Not only is this a strenuous hike on its own, but it brings you up to an elevation of 10,899 ft (3,322 m). As such, those coming from lower elevations will definitely want to do one or two warmup hikes before attempting this one.
The Sky Pond hike is also known for its challenging waterfall scramble that you’ll have to get through shortly before the summit. While definitely doable for most hikers, the experience can be nerve-wracking, and those with a major fear of heights might want to end their hike early.
All in all, my hike to Sky Pond and back (including rest time) took me about 5.5 hours in total.
As we’ll cover just below, you’ll need a Timed Entry + Bear Lake Road permit to access the trailhead for this hike.
WHAT TO BRING: You’ll definitely want to wear proper hiking boots or trail runners, as the hike can get very rocky.
Trekking poles are also a great idea, though I’d only recommend bringing one so that you’ll have a free hand for the waterfall scramble.
Of course, you’ll also want to bring snacks, plenty of water, a hat, sunscreen and a camera.
RECOMMENDED APPS: You can find the full hike outlined on AllTrails, though you’ll need to pay for a subscription and download the offline version in advance.
Otherwise, the free offline map app Organic Maps should come in handy as well.
STAY SAFE: Rocky Mountain National Park is known for its afternoon thunderstorms that can occur suddenly, especially from around noon to 3 pm.
Therefore, when doing long and strenuous hikes that take you above the tree line, it’s imperative that you get an early start. It’s generally recommended that you’re at least back beneath the tree line by noon or 13:00.
I was extremely lucky during my trip and didn’t experience a single storm. But during my descent from Sky Pond, I did see grey clouds suddenly appear out of nowhere on what had been a clear and sunny day.
Bear Lake Road: Important Information
TIMED ENTRY PERMITS: Presently, Rocky Mountain National Park is implementing a Timed Entry Permit System during the peak summer season (specifically May 24 – Oct 24) to reduce overcrowding.
There are two types of these permits. One is for every part of the park except for Bear Lake Road, and these permits are only required from 9:00-15:00.
But as the trailhead for Sky Pond is situated along Bear Lake Road, you’ll need to reserve a special version of the permit known as Timed Entry + Bear Lake Road.
These permits are required to access Bear Lake Road from as early as 6:00 (confusingly, some signs even say 5:00), so they’re especially important to obtain.
From my experience, compared with securing permits for Glacier National Park, I had no issues getting all the permits needed for Rocky Mountain on the day they went on sale. And compared with a regular permit, there’s no special process for securing a Timed Entry + Bear Lake Road permit other than selecting that product for the day you want.
Still, it would be wise to purchase them as soon as possible so you don’t experience any major disappointments.
You can purchase the permits online here.
Both versions of the permit go on sale on the first day of the month before the month you plan on visiting the park. For example, if you plan on visiting any time in August, Timed Entry Permits for that month will go on sale on July 1.
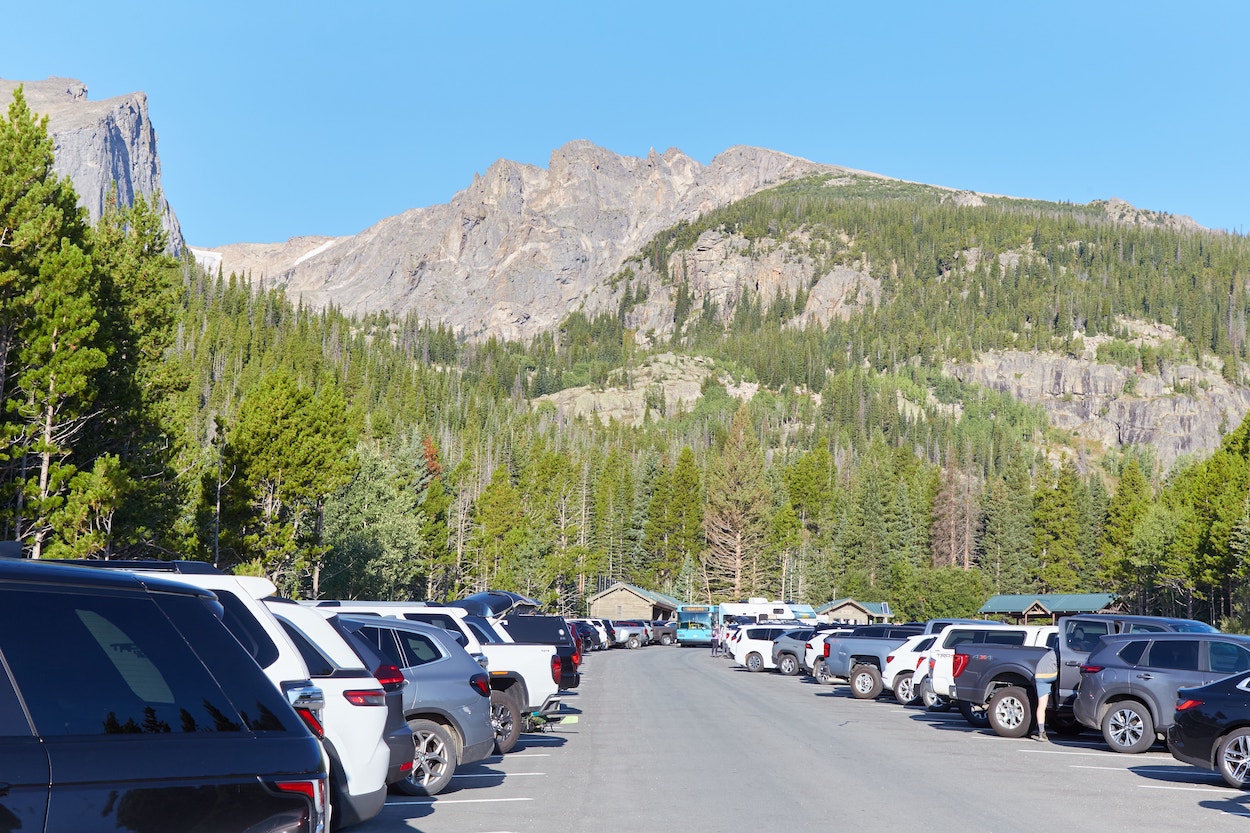
BEAR LAKE ROAD PARKING: Assuming you’ve secured your Timed Entry + Bear Lake Road permit for the day you want to hike, you’ll still have to deal with parking.
Basically, you have a few main options. First of all, you can park at the Park & Ride Transit Hub which is about halfway down Bear Lake Road. From there, you can take a free shuttle all the way down to the main Bear Lake Parking lot, from which you can then hike to the area’s lakes as well as Sky Pond. (Note: You’ll still need the special permit to even access the Transit Hub and shuttle.)
Otherwise, you can attempt to drive to the very end of the road to either park at the small Glacier Gorge Parking Lot or the much larger Bear Lake Parking Lot.
This is somewhat risky, as you’ll have no choice but to turn around if you find these lots full. And it’s a roughly 15-minute drive each way between the Park & Ride Transit Hub and the Bear Lake Parking Lot, so you could potentially end up wasting lots of time.
In my case, I took the risk and drove all the way to the Bear Lake Parking Lot two days in a row. The first day, I arrived there a little after 8:00 am and managed to find what was probably the very last open spot.
The next day, I arrived around 7:30 and encountered fifteen or so open spots. This was in summer peak season but after kids had already returned to school.
Note that at the entrance to Bear Lake Road, you may see a sign indicating that the Bear Lake Parking Lot is full, but that doesn’t necessarily mean it really is.
Beginning the Sky Pond Hike
You can begin this hike from either the main Bear Lake Parking Lot or the smaller Glacier Gorge Parking Lot located a little bit before it. But considering how the Glacier Gorge Parking Lot is much smaller, you’re likely going to have trouble finding a spot there.
While the AllTrails map and other online guides may tell you to start at the Glacier Gorge Parking Lot, you can easily start from the Bear Lake Parking Lot instead, and it will barely make any difference to your overall time.


The first landmark on this hike is Alberta Falls. Many visitors come to this area solely to hike to Alberta Falls (about 0.6 miles from the trailhead) as an out-and-back hike. Or perhaps to see it on their way to Mills Lake.
But on this long Sky Pond hike, it’s just one significant landmark of many. While it’s worth stopping for a bit to admire the falls on your way up, you’ll also pass them again on the way down.


Past Alberta Falls, you’ll find yourself walking along the stunning Glacier Gorge Trail. I’d previously hiked this part of the trail as part of my long lakes loop hike. But I had no complaints about traversing this section again.


Eventually, you’ll encounter the Loch-Mills Junction. It’s here that various trails intersect, but follow the signs pointing you toward Loch Vale and Sky Pond.
From here, Sky Pond is technically just 2.7 miles away, which may not seem like a whole lot. But making it to your final destination is indeed going to be a workout.


Past the junction, you’ll find yourself overlooking Tyndall Creek which feeds Alberta Falls, followed by a series of steep switchbacks.
This is the first really tiring portion of the hike, though how well you fare will largely depend on how acclimated you are to these higher elevations.


Your hard work will soon pay off, as it won’t be long before you encounter The Loch, one of the area’s most scenic lakes. Even without any special apps, the wooden signs will help point you in the right direction.


The Loch
As mentioned, The Loch is one of the most picturesque lakes you’ll find in the Bear Lake Road area, if not Rocky Mountain National Park as a whole. The long lake is consistently fed by a perennial stream, while it’s surrounded on all sides by spruce-fir forest.


The Loch is a great place to take a break to rest and refuel before the final grueling ascent. Walking around, I found a path to a rocky area with tremendous views of the lake and its surrounding mountains. I couldn’t have asked for more of a scenic place to eat breakfast!


Moving on, it was time to continue heading southwest via the lakeside path. This would be the last little bit of flat trail before the final stretch up to Sky Pond.


From here, the path becomes a bit rockier, while you’ll also traverse creeks and grassy meadows via narrow wooden planks. All in all, the Sky Pond hike is pretty straightforward, and there should be little doubt as to where to go as long as you follow the signs and other hikers.


The Final Ascent
As the trail becomes steeper and steeper, you’ll likely find yourself stopping frequently for breaks. At this point, you’ll be at an elevation over 10,000 feet, which can be a big deal for those not used to high altitudes.


The Sky Pond hike isn’t merely steep, but it’s somewhat infamous for another reason. The only way to reach the top is to climb up a waterfall! And you’ll soon encounter it after ascending a final set of steep stone steps.

Fortunately, the section that you have to climb up is not the strong, gushing waterfall you’ll have spotted from a distance.
As you get closer, you’ll first find yourself walking up a relatively flat set of wet rocks, after which comes the steepest and most challenging section.


You won’t find any clear signage telling you exactly which part to climb or which side of the rocks are better. But from my experience, when going up, you’ll generally want to stick to the right.
It would also be wise to stop and look for a while, observing what others are doing as you plan out a rough route in your head. It’s a little intimidating to have water flowing toward you, but if you just focus on the rocks you should be okay.
All in all, the waterfall scramble is indeed challenging, but the key is to take things one step at a time. And given the steepness of the rocks, people above and below you can often see different angles than you can from up close. Be sure to listen to their suggestions.


In anticipation of the waterfall scramble, I brought a small backpack for this hike as opposed to the messenger bag I usually carry. And as opposed to two trekking poles, I only brought one.
Though I’d anticipated perhaps having to leave it behind to come back for it later, I ultimately made it to the top of the scramble with the pole in hand.

Once you’ve reached the top, be sure to turn around for one of the most impressive vantage points of the entire Sky Pond hike. In addition to the distant trees and forests, you’ll also be able to spot The Loch down below.
In the other direction, meanwhile, is yet another jaw-dropping view. This is not yet Sky Pond itself, but Glass Lake.
Glass Lake & Sky Pond

Based on prior research, I’d been under the impression that Sky Pond was a short and straightforward walk past Glass Lake. I was not at all prepared for the actual route being so confusing.


Looking at the lake, I was unable to spot a straightforward trail running alongside it. And so I decided to walk up the rocks and boulders above the lake for a better vantage point.
Still unable to find a trail, I kept walking along the rocks before realizing something wasn’t right. Eventually, I did spot a trail along the lake and made my way there.
It turns out that one does have to climb up the rocks for a bit upon arrival at Glass Lake, though not for very long. It shouldn’t be too long before you make your way down again to the official trail, which is a bit obscured by trees.

Past Glass Lake, it’s another uphill and somewhat rocky climb to your final destination. But at least the trail here is much better defined. You’ll pass by a small waterfall and some grassy meadows before Sky Pond itself finally comes into view.


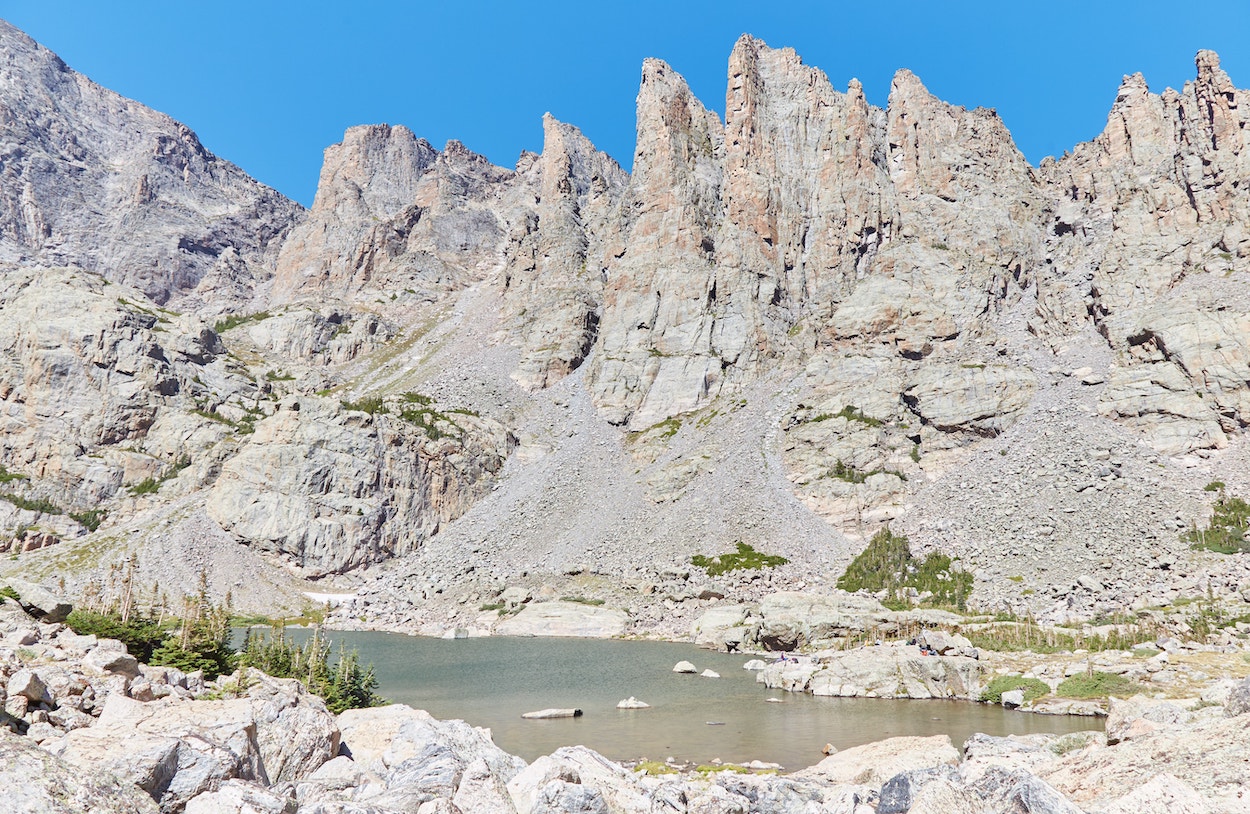
Arriving at Sky Pond means you’ve officially reached an elevation of 10,899 ft (3,322 m). This stunning lake, which is entirely surrounded by jagged mountain peaks, really does feel like a secret pond in the sky.

Exhausted after such a strenuous hike, I sat down on some rocks by the water, taking in the views as I downed the remainder of my snacks. And after gaining back some of my energy, I couldn’t resist the temptation to see the lake from the eastern side.
But that’s much easier said than done.


Not only is the way there very rocky, but you’ll have to use the rocks to carefully make your way across a river. And once across the river, you’ll have to climb up a large stack of boulders before coming down again.
But the effort will pay off, as the views from the eastern side of the lake allow you to take in Sky Pond and its mountainous backdrop even more clearly.
Just remember that if you do make it to this side of the lake, you’ll have to repeat the same process to return.


Finally, it was time to begin the descent. Finding the main trail again wasn’t as easy as I’d hoped, but I did eventually find it and made it to Glass Lake without incident. But there was still one more major challenge left in this Sky Pond hike.

As challenging as the waterfall scramble was to climb up, I was dreading the climb back down. And it did indeed turn out to be a bit more difficult.

Coming down, you generally want to keep to the left. And as mentioned above, the steepness of the terrain makes it difficult to clearly view everything, but some people waiting to come up were giving me helpful advice as to where to place my feet.
Just expect to have to slide on your butt at some points. And while my trekking pole was somewhat of a hindrance in some places, at other points I was glad I had it.
Note that not everyone decides to go through with the waterfall scramble, and I met several hikers sitting around at the bottom as they waited for their friends. You’d still have a great hike just by coming as far as this point.


The return trek was just as scenic as the way up, but thankfully a lot less tiring. As you can see from these photos, I got very lucky with clear blue skies for the first half of the trek.
But seemingly out of nowhere, dark grey clouds appeared in the sky and remained there throughout my descent. While it ultimately wouldn’t rain, I was really glad to have gotten an early start.
On your way back, it would also be possible to make a detour to check out Mills Lake. But if time allows, I’d recommend visiting that lake the day before as part of a longer loop hike which would also help you acclimate to the higher elevations.
Additional Info
The most convenient base for Rocky Mountain National Park is the town of Estes Park, located just to the east. Most of the park’s significant hikes and landmarks are also located in the east of the park, so staying in Estes Park would allow you to get an early start.
Furthermore, it’s quite a charming town with plenty of restaurants and amenities to choose from. However, in regards to hotel prices, the town is far from budget-friendly.
Popular mid-range options include Olympus Lodge and Coyote Mountain Lodge. Those with bigger budgets might want to consider private lodgings such as the Fall River Casita or Old Man Mountain.
But if Estes Park is out of your budget, what are the next best options?
One option is the town of Lyons, which is about 30 minutes southeast of Estes Park. I originally booked a hotel here, but had to cancel due to a slight scheduling alteration. I did drive through Lyons at one point, and while it seems like a fine base, it does seem a bit lacking in terms of restaurants and shops.
Ultimately, I ended up staying in the city of Loveland at the Travelodge by Wyndham. The positives of Loveland are that it’s a sizable town with plenty of hotels, shops and restaurants to choose from. And the hotels are surprisingly affordable.
The main downside is the distance from the park. Each morning, we had to drive through a scenic yet winding canyon, with the journey to Estes Park lasting nearly an hour, not to mention additional driving to that day’s trailhead. Nevertheless, it was still nice to be able to stay near Rocky Mountain for such a cheap price.
As mentioned above, the town of Grand Lake is just outside the southwest boundary of the park, and it seems to be a lot more affordable than Estes Park. But with the exception of a hike like Mr. Ida, using Grand Lake as your base would mean you’d have to do a lot of driving each day – mainly down Trail Ridge Road. As thrilling as that road is, it’s probably not something most visitors would want to have to deal with daily.
At the time of writing, Rocky Mountain National Park costs $30 per vehicle per day, or $35 per vehicle per week (learn more here).
US National Parks parks typically charge per vehicle rather than per person. However, if you’re traveling by bicycle instead, Rocky Mountain will charge you for an individual pass which costs $25, while those on motorcycles will be charged $30.
Considering how many National Parks and National Monuments there are to see in the Southwest alone, the best option for most will be to buy an ‘America the Beautiful’ Annual National Parks Pass.
These cost $80 for the year. In most cases, you’re already saving money by just visiting four National Parks/Monuments anywhere in the country within a full year.
What’s more, is that only one person in your vehicle needs to have the pass. Additionally, seniors can buy the pass for just $20. So if you have someone over 62 in your party, just have them get the annual pass and everyone else will be set.
As for where to get the pass, you can purchase it in person at most National Parks or Monuments. But you can also order it in advance online.